Camper Interior Build in the Defender: First in CAD, Then in Wood
Most camper builds come together with a tape measure, a pencil, and a lot of gut feeling. Ours took a different approach: it was fully modelled in SolidWorks before a single panel was cut. The complete CAD model exists — with colours, with every module in its place. For someone coming from mechanical engineering and CAD design, that’s the obvious way to go. And yet — as a preview — reality ended up looking quite different from the screen in many places. That’s exactly the interesting story.
Why Plan on a Computer at All
The interior of a Defender is small. Very small. When a bed, kitchen, storage, and water all have to fit into such a tight space, every centimetre is accounted for, and one miscalculation costs you an entire panel later on. On the computer you can shift modules around, try out different heights, and spot clashes before expensive plywood turns into sawdust. The CAD model was our map — the one everything else was oriented around. And the honest value lies less in the perfect end result than in making the big mistakes early, where they cost nothing.
Everything That Had to Fit Inside
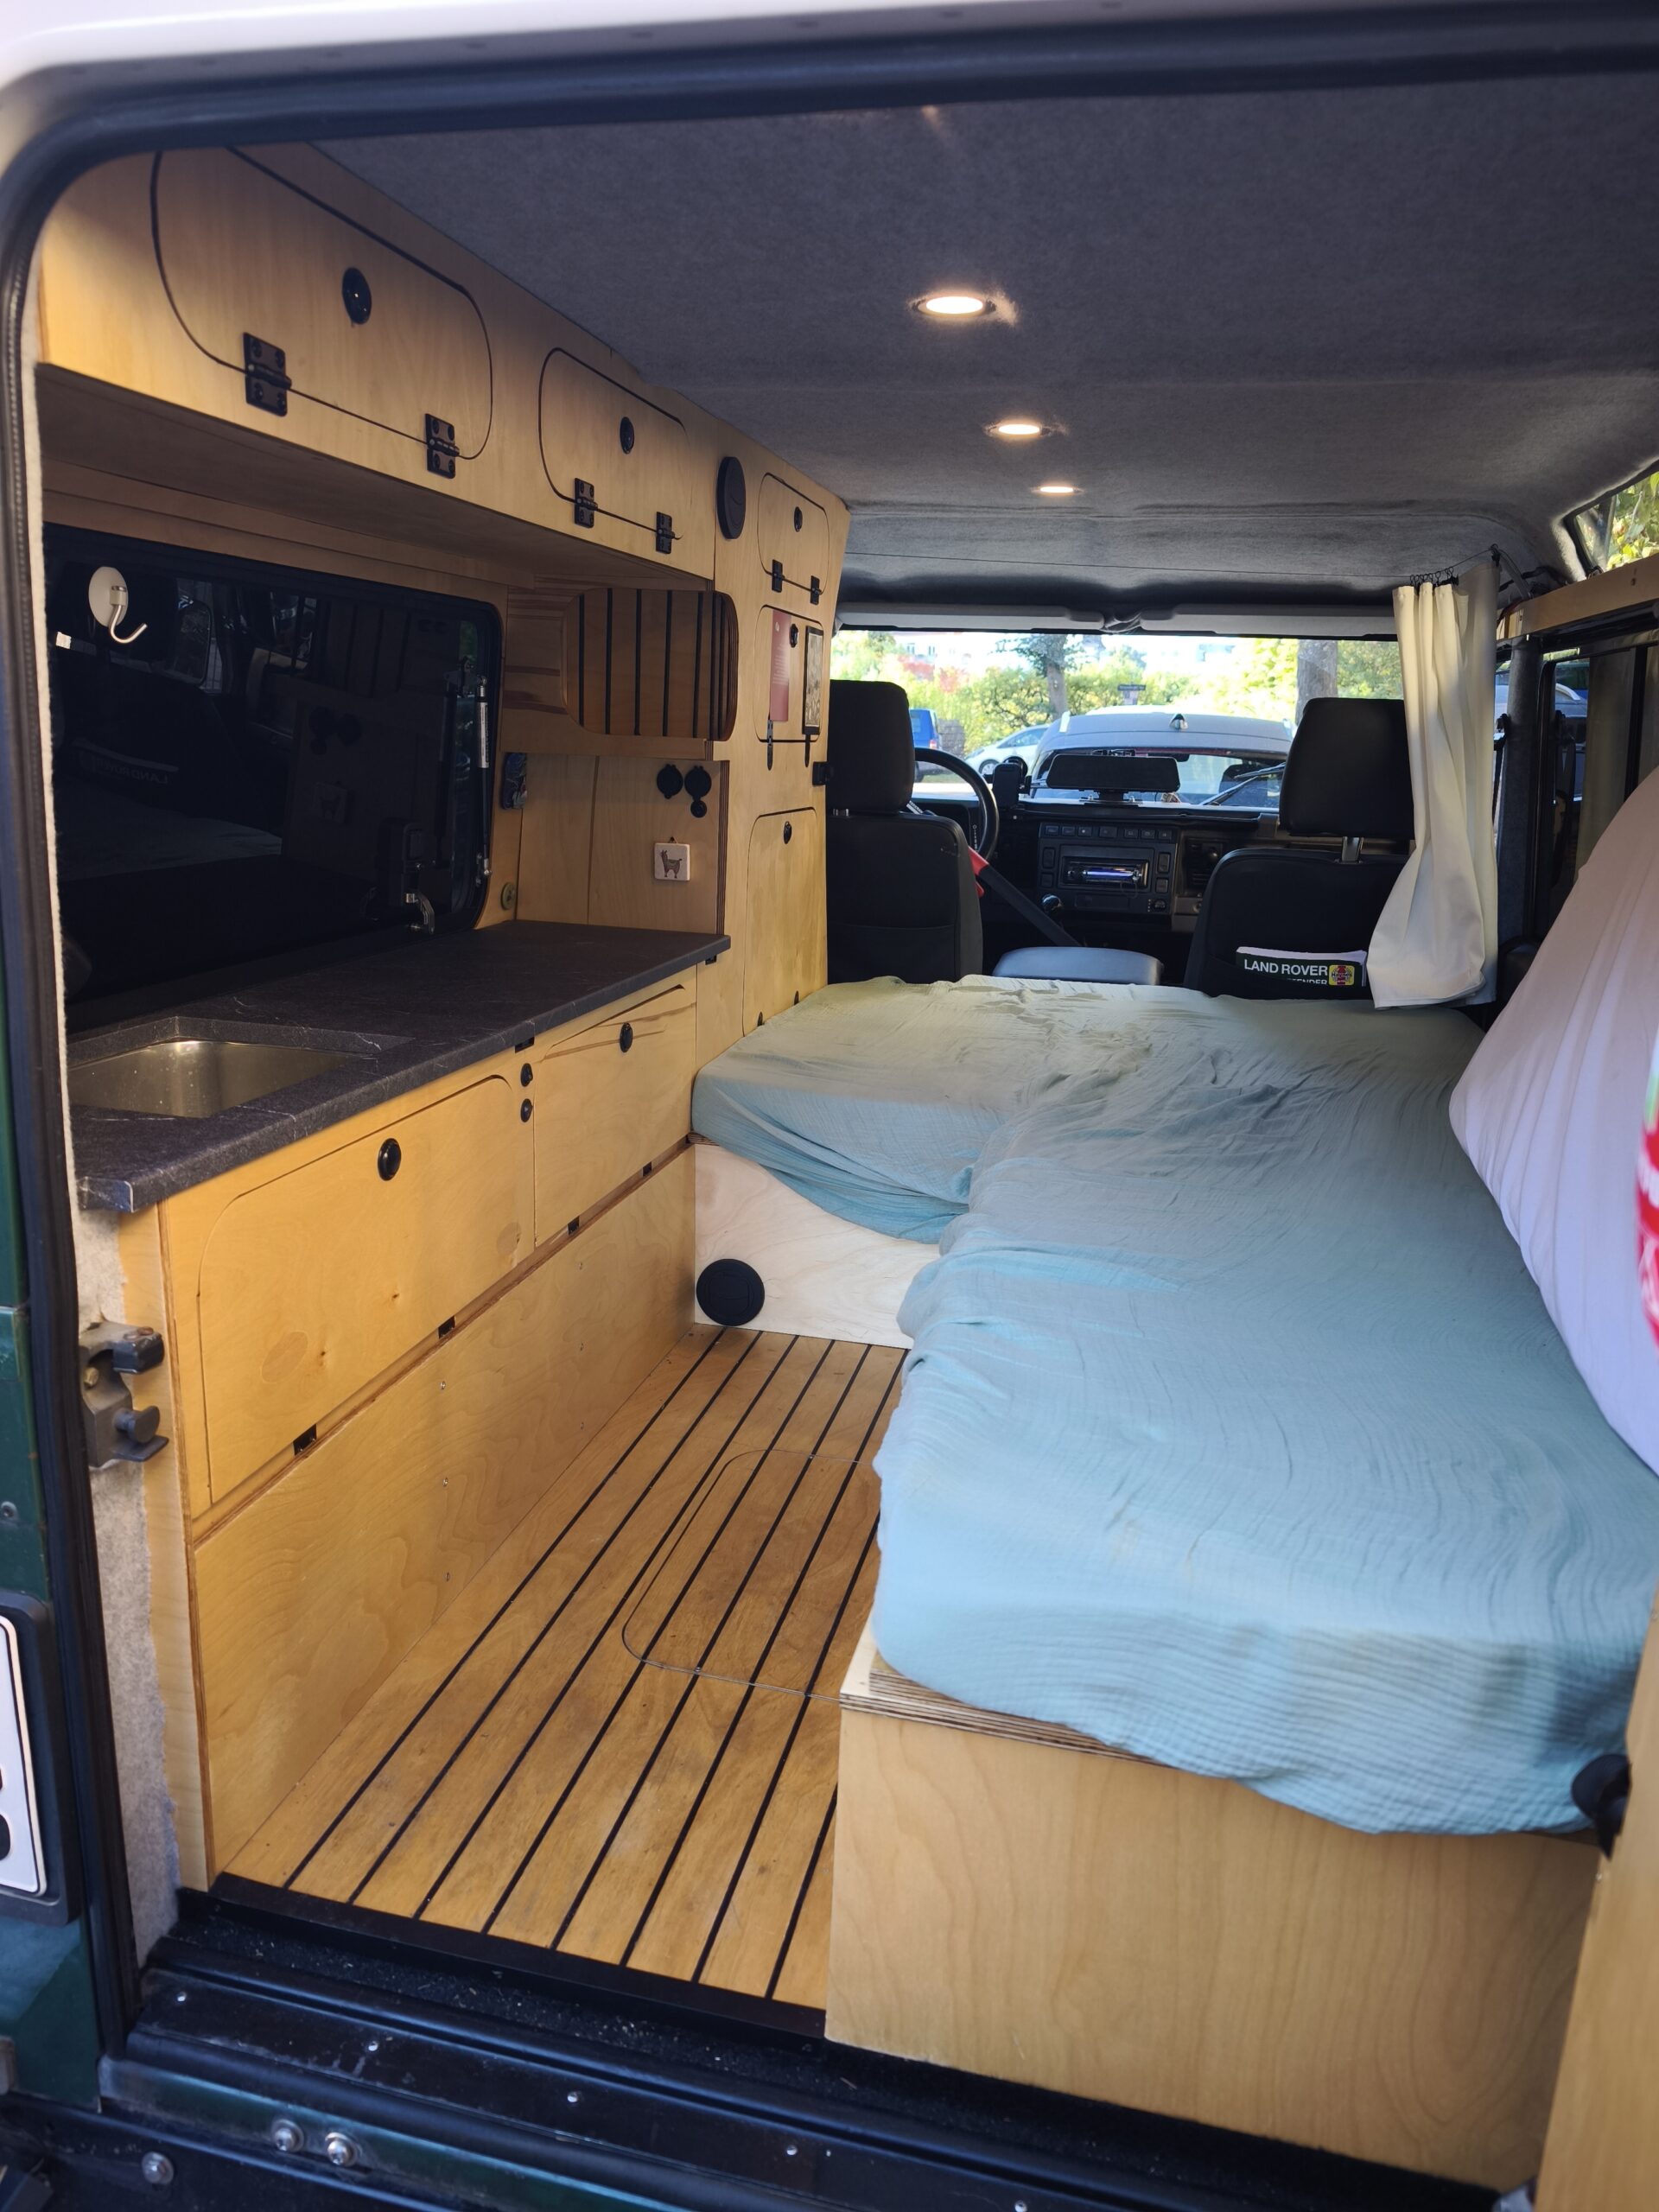
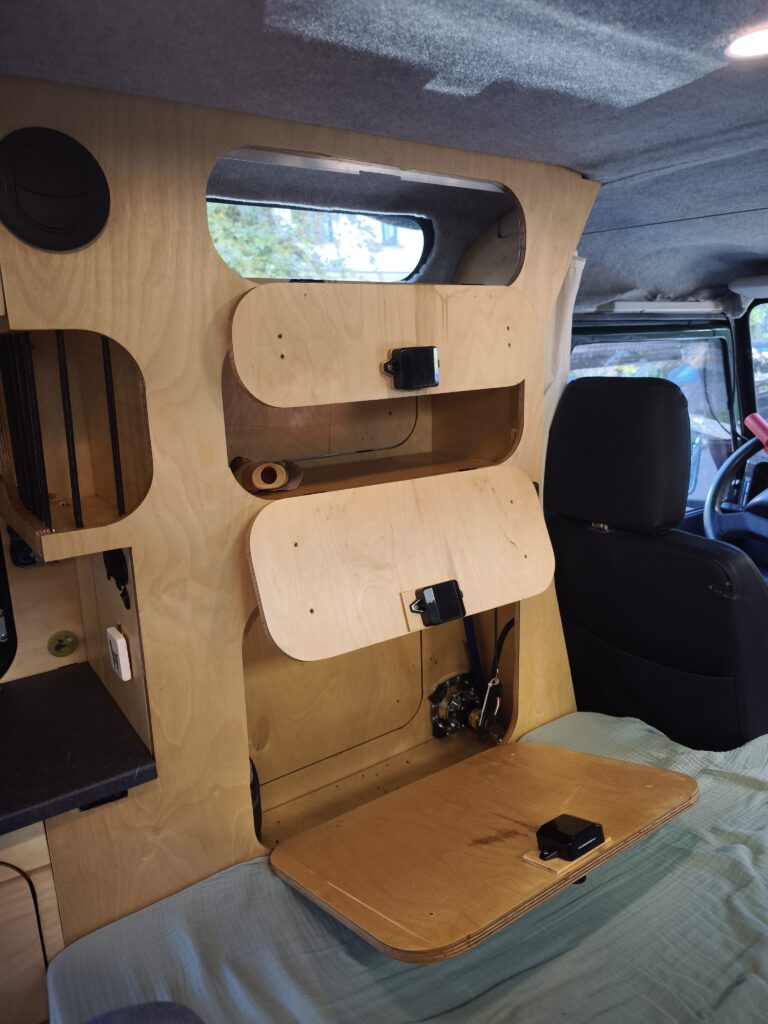
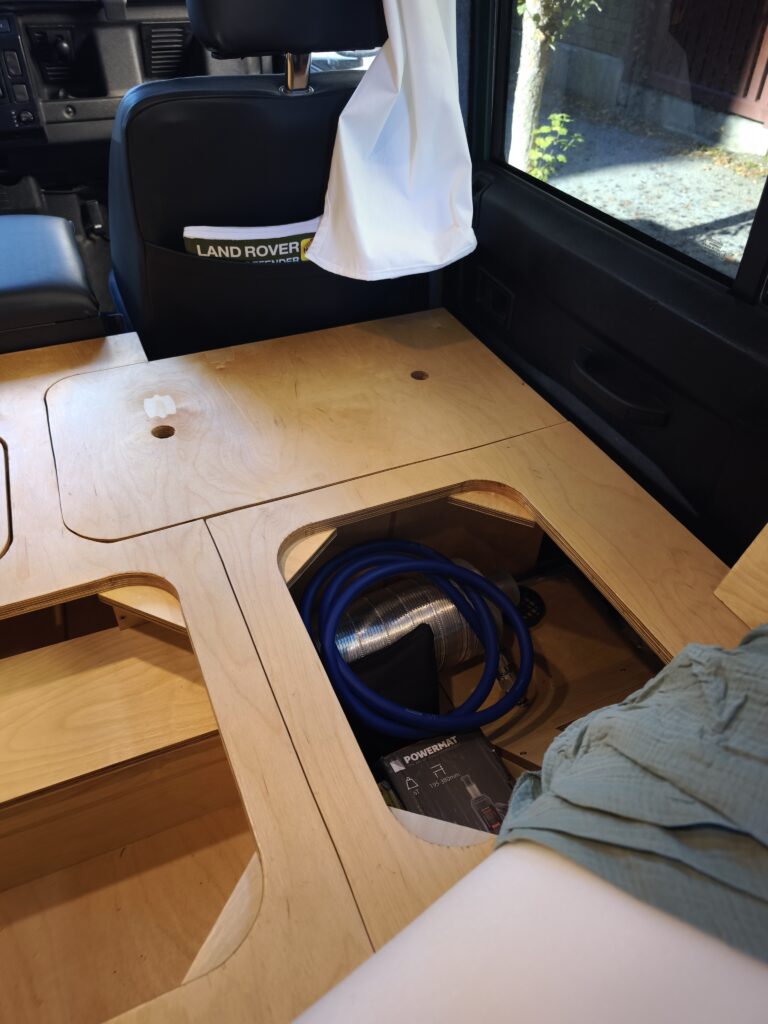
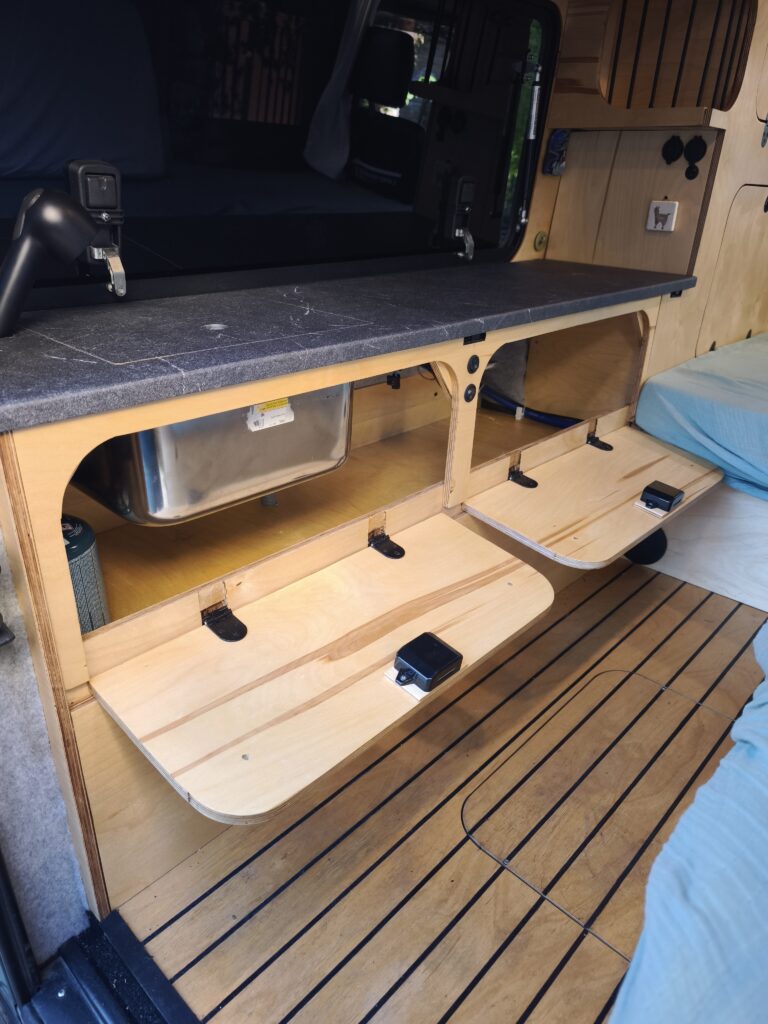
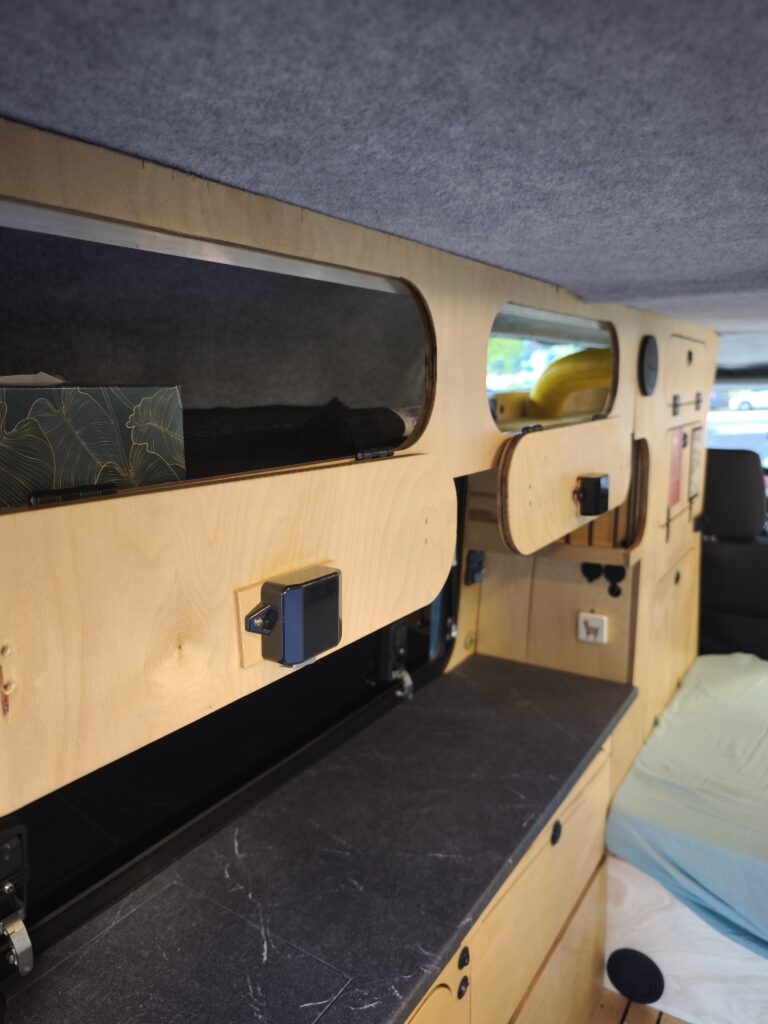
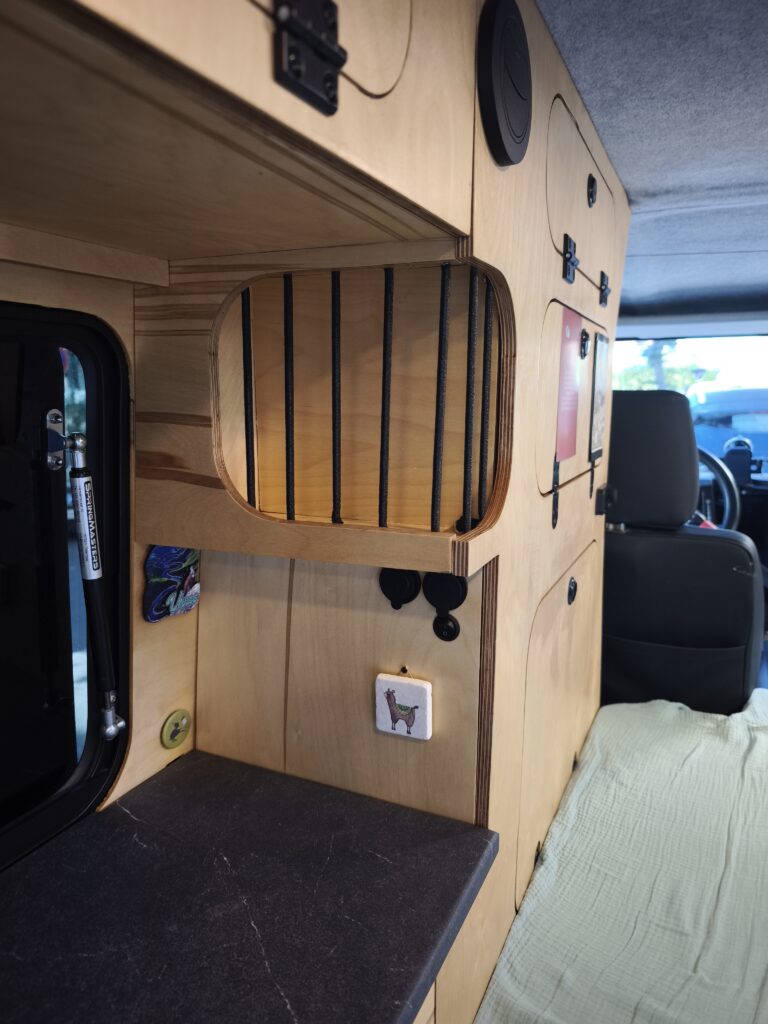
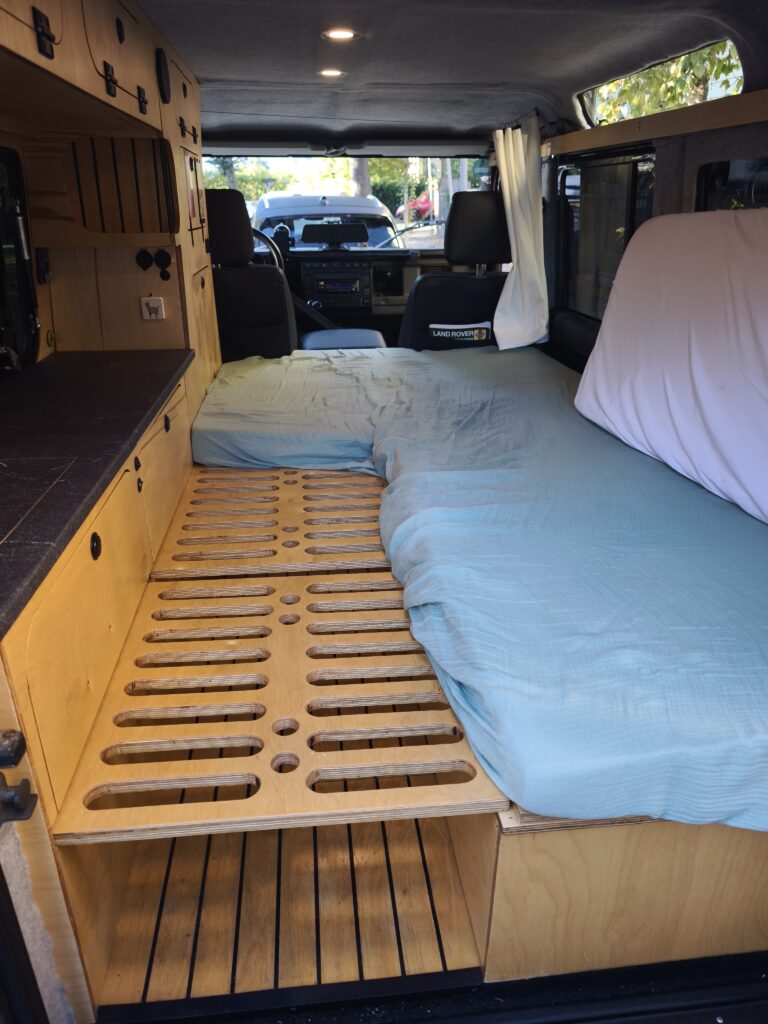
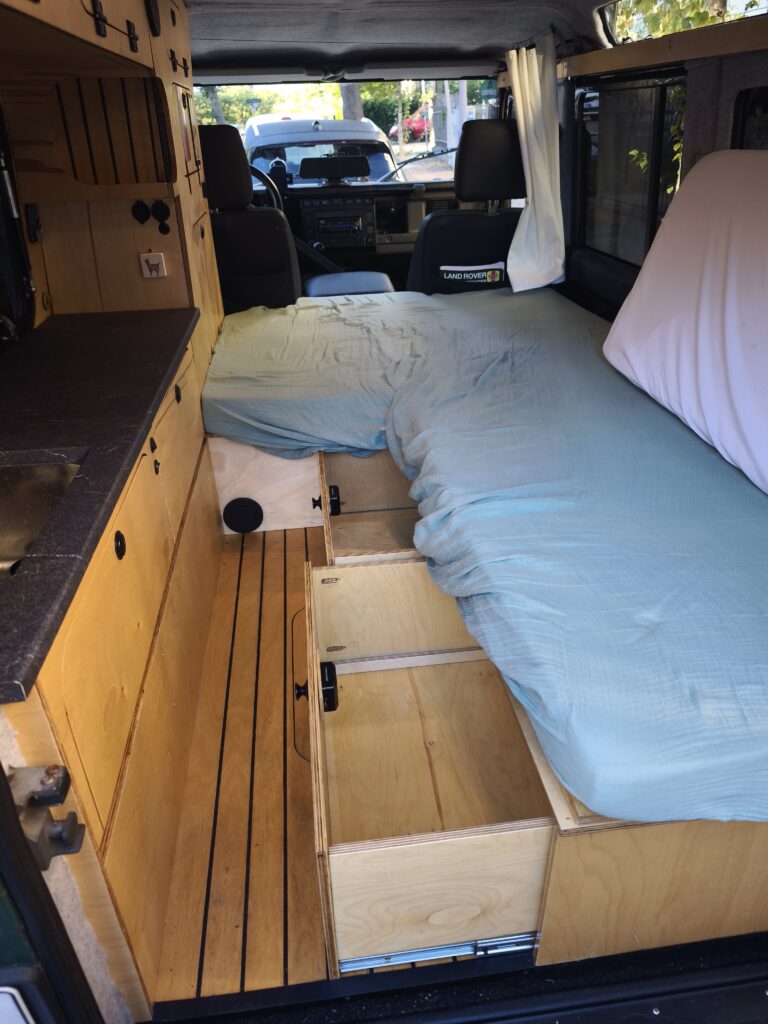
The goal was to fit the full package into a minimal footprint: sleeping surface, kitchen, storage, and water supply. None of it was optional, and none of it could block the rest. The whole geometry of the build grew out of this puzzle. The cabinet on the left side has one large compartment for shoes and smaller compartments for toiletries and books, for example. Under the mattress, several large compartments hide away jackets, a jack, and various items needed regularly. Under the kitchen unit there’s also enough space for all the food, our kettle, pots, and a gas cartridge. We wrapped the kitchen surface ourselves with an appropriate adhesive film.
The Coolbox Sets the Height
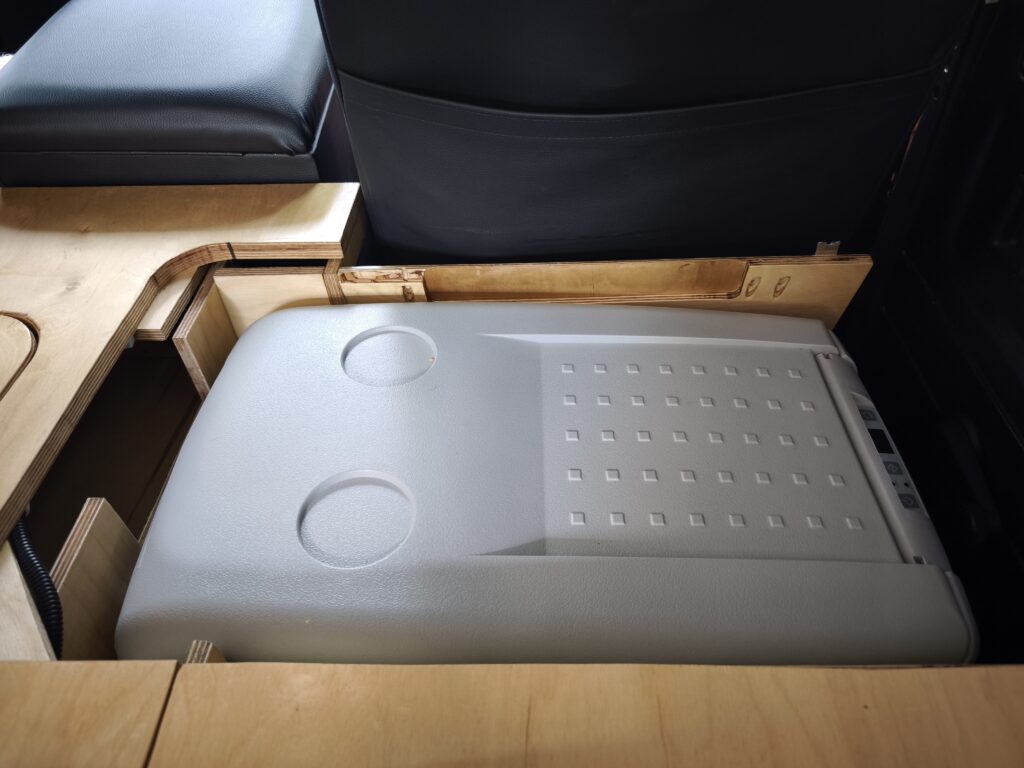
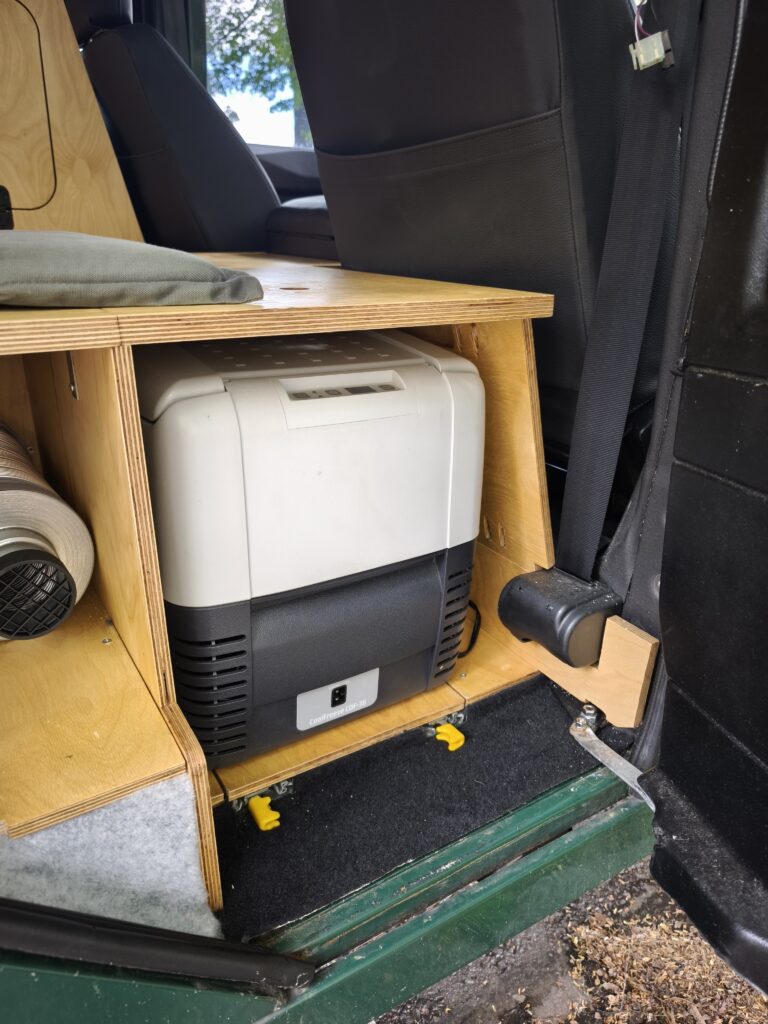
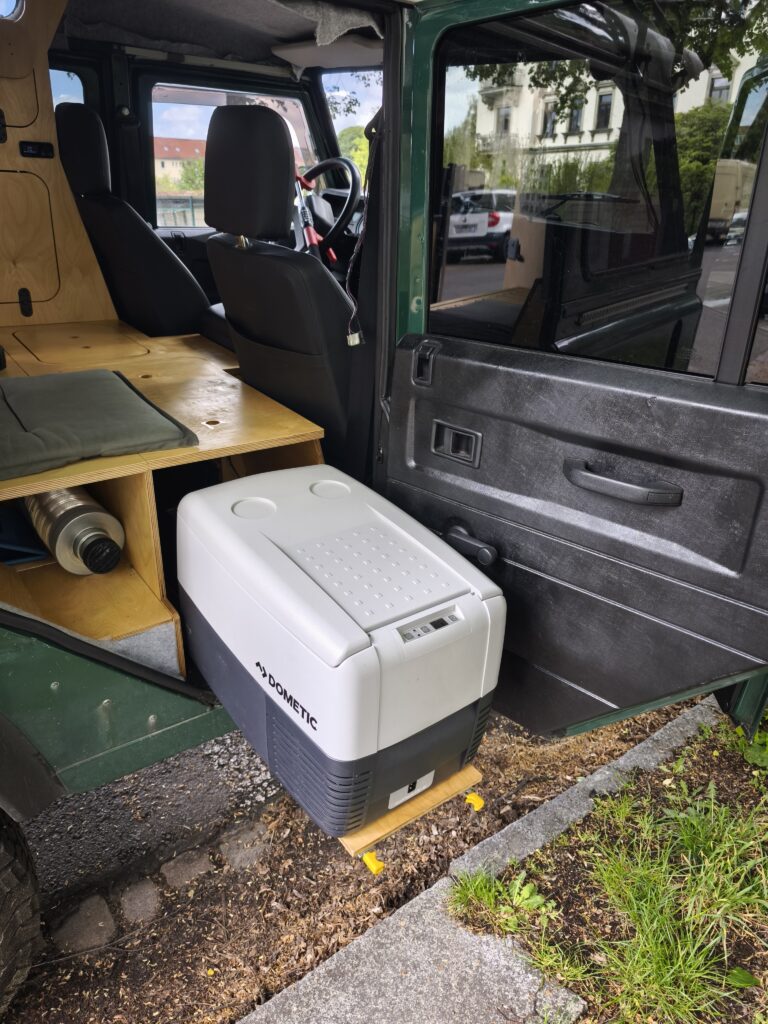
When you plan a build, there’s always one component that calls the shots — for us, that was the coolbox. It was the starting point for the height of the entire level: first we established how tall the coolbox is and how it needs to remain accessible, and everything else followed from there. Pinning down a “governing dimension” like that early on takes hundreds of small decisions off the table later. The coolbox can also be opened inside the vehicle or pulled out on rails. On a nice day or when loading it up, pulling it out makes sense. But if you want a cold drink while driving, access is still possible. The coolbox simply sits loose on the pull-out shelf, which means you can take the whole box with you — to the beach, for example — at any time.
Material and Weight: a Deliberate 12 mm
On material, we stayed consistent: 12 mm plywood for almost everything, with only the sleeping surface done in 18 mm in places, because it has to safely carry the weight of two people. Many builders default to 15 or 18 mm across the board — we made a deliberate decision against that. In a Defender, payload is tight, and every kilogram in the build is a kilogram less for water, equipment, and luggage. Our experience after some time on the road: 12 mm is perfectly adequate for the vast majority of surfaces, as long as the construction and fixings are right. Lightweight isn’t a compromise here — it’s a decision for more range.
All Screwed Together — and Hidden
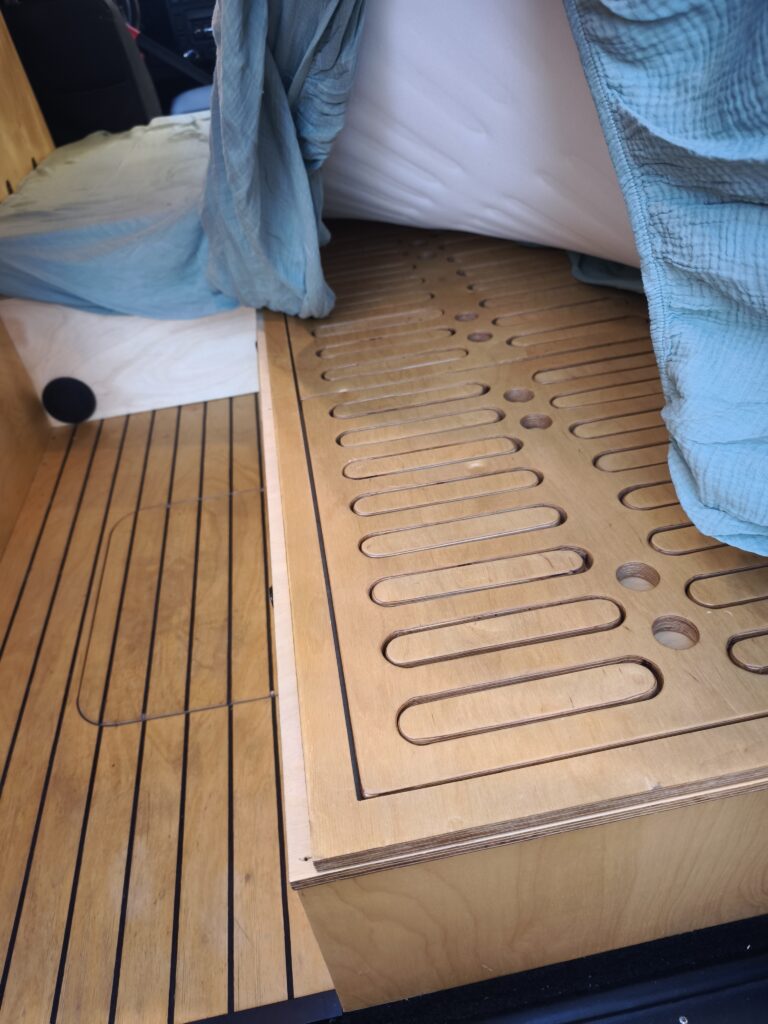
The entire build is fastened with screws, and with countersunk holes hidden from view. There are two reasons for that: it looks clean without screw heads sticking out everywhere, and it stays demountable. A camper build is never truly finished — you only find out on the road what’s missing or could be better. If you’ve used screws instead of glue, you can undo a module in two years and improve it rather than ripping it out (→ substructure). The compartments under the mattress simply rest in place and can be lifted out. The flaps are fastened with simple camper latches. The spice rack is made from individual elastic bands.
Sleeping Surface
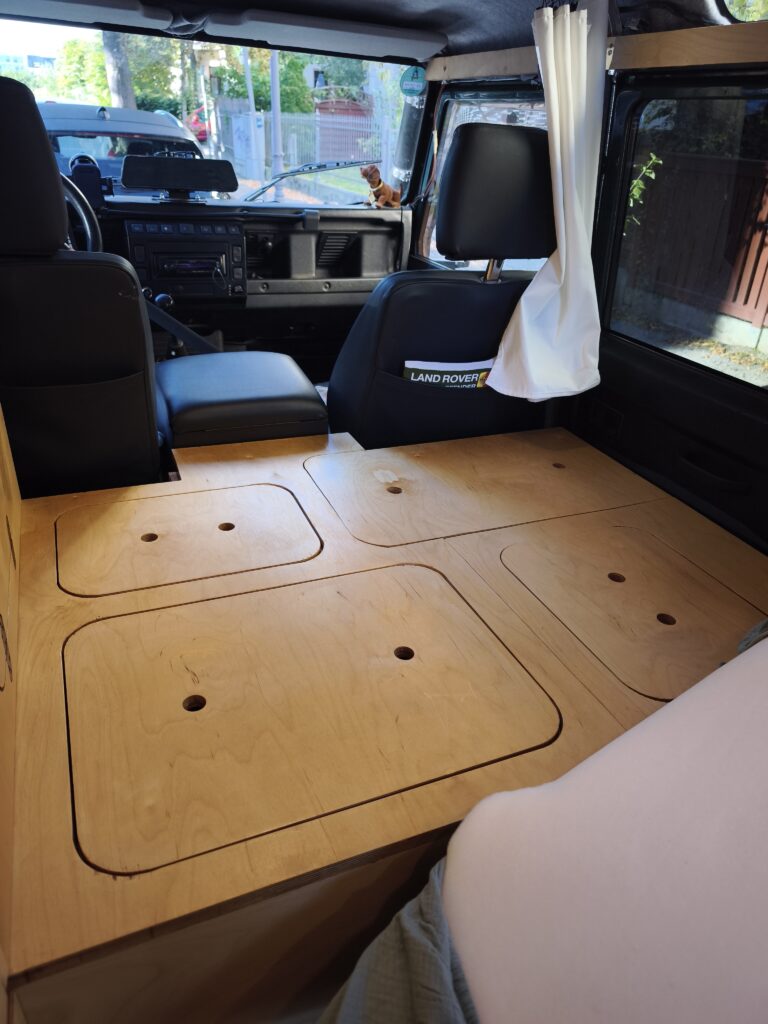
There are always places and situations where you’d rather not sleep in an exposed rooftop tent — during a heavy storm, or in a city, for example. For those cases, we have the option to set up a sleeping surface. Hidden under the mattress are slatted frames that can be laid across the narrow aisle. The backrest is exactly the same width as this newly created surface, forming a continuous sleeping area for two people.
Where Plan and Reality Diverge
And now the most honest part, which almost no build article mentions: a car is not symmetrical. You can measure everything carefully, design it cleanly, and still find that the left side is different from the right, that a panel is slightly wavy, or that an angle is simply not the clean 90 degrees the CAD model assumes. Reality always deviates. The result was a lot of rework: adjusting parts, trimming, breaking edges, taking off a few millimetres here, shimming there. Even during assembly we had to change details, because it was only during the actual fit that we saw just how tight things really were.
This isn’t a criticism of CAD planning — quite the opposite. Without the model, the deviations would have been far more costly. But anyone who thinks a clean plan eliminates the need for on-site adjustment will quickly learn otherwise with an old Defender. Build the rework time in from the start.
Conclusion
First in SolidWorks, then in wood — and in between, plenty of filing, sawing, and sanding. The CAD model gave us the rough structure, the heights, and the confidence that everything would fit before the first panel was cut. The car itself dictated the rest. What came out is a lightweight, compact build where everything has its place — in a very tight space, with weight in mind, and always ready to be changed.