
Underbody Protection for Old Vehicles: A Step-by-Step Guide
There’s a sound that every off-road driver knows — that dull, hollow thud when a stone clips the underside of the truck, somewhere below the floor, somewhere you can’t see from the driver’s seat. For most people, it’s a brief moment of wincing, then back to the track. But for anyone running an older vehicle — a Defender, an old Hilux, a classic Series Land Rover, anything with genuine mileage under its belt — that sound is a reminder of something that deserves proper attention: the underbody.
The underside of a vehicle is its most exposed surface. It takes the mud, the water, the salt, the stone chips, the heat from the exhaust, and the cold of a wet night in the hills. And in most cases, it’s the last place people look until it’s already too late. If your vehicle has seen more than a decade of honest work, or if it came to you with a questionable service history and the kind of patchy underbody sealant that bubbles and flakes off in strips — this guide is for you.
This isn’t a quick tip. This is a step-by-step walkthrough of how to do underbody protection on an older vehicle properly — from first inspection all the way through to the final coat of cavity wax.
Why the Underbody Is the First Thing You Should Check
When you buy an old vehicle — or when you’re working on one you’ve had for years — the tendency is to focus on what you can see. Engine, bodywork, interior. The underbody is awkward to access, usually covered in a layer of compressed mud and old underseal, and rarely something anyone photographs for a sale listing.
Which is exactly why it needs your attention first.
Water doesn’t stay on the surface. It works its way in through every gap, every failed seam, every crack in old protective coating — and once it’s sitting against bare steel, the rust clock starts. Slowly at first, then faster than you’d expect. On an older vehicle that’s spent time in wet or coastal climates, or that’s been used seriously off-road, it’s almost inevitable that some corrosion is already there. The question is how far it’s progressed — and whether you deal with it now or in two years, when the repair bill looks very different.
What You Need Before You Start
You don’t need a professional workshop for this, but you do need to be prepared. Rushing through underbody work with the wrong materials is worse than doing nothing, because it seals problems in rather than solving them.
Here’s what you should have on hand before you start:
- Vehicle lift, drive-on ramps, or a set of solid axle stands — access is everything
- High-pressure washer or steam cleaner
- Wire brush attachments and an angle grinder
- Rust converter (phosphoric acid-based)
- Two-component epoxy primer or zinc phosphate primer
- Underbody sealant / stone chip protection (brush-on or aerosol)
- Wax-based cavity protection spray
- Cavity wax application lance (for chassis rails and sills)
- Safety glasses, gloves, old clothes — this job is not clean
If there is visible rust-through or structural corrosion, you will also need a MIG welder, new steel sheet, and either the skills or a contact to handle the metalwork before the protective coatings go on. There is no product that protects steel that is no longer there.
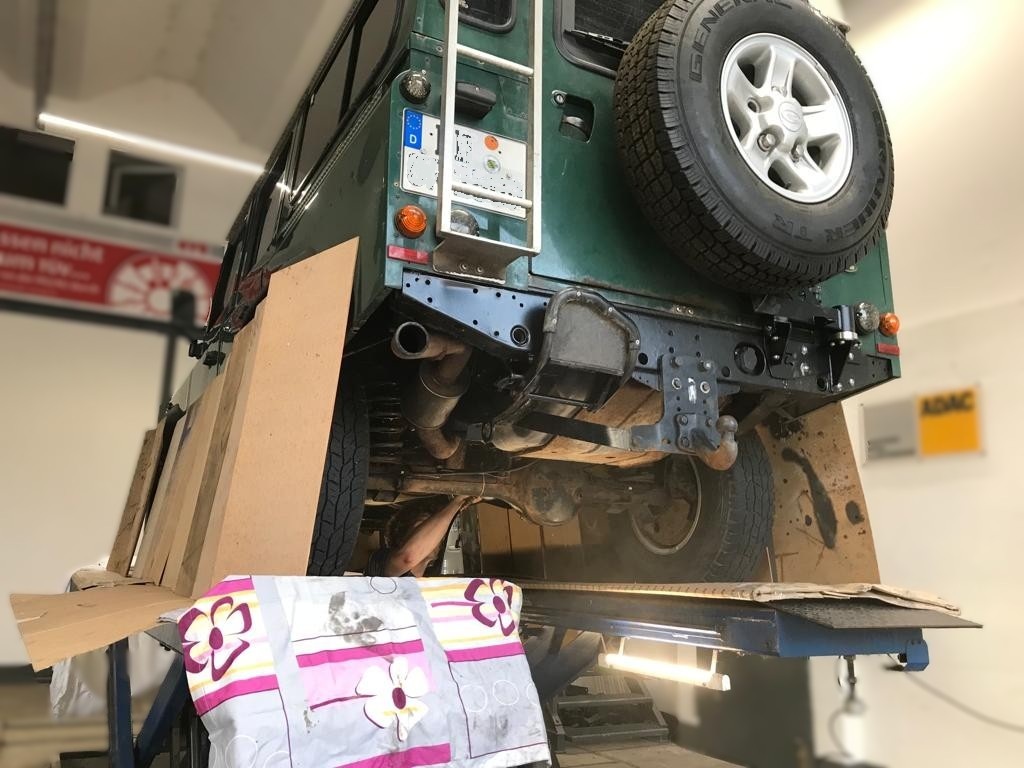
Step 1: Lift It, Light It Up — Getting Underneath Properly
The first and most important thing is access. A car on a jack with one wheel in the air tells you almost nothing about the state of the underbody. You need the whole vehicle elevated, stable, and with enough clearance to move a torch — and ideally your body — freely underneath it.
Drive-on ramps work for a first look. For a proper job, four solid axle stands at the correct jacking points are the better choice. They’re more stable, give you more height to work with, and let you move freely from one end of the vehicle to the other.
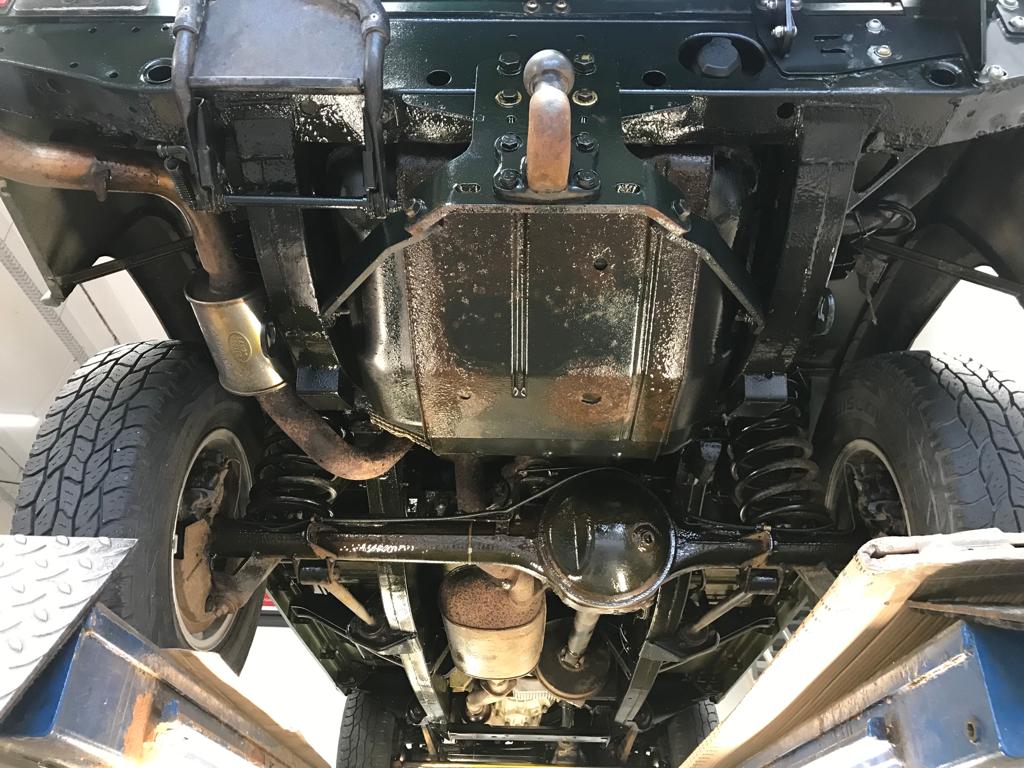
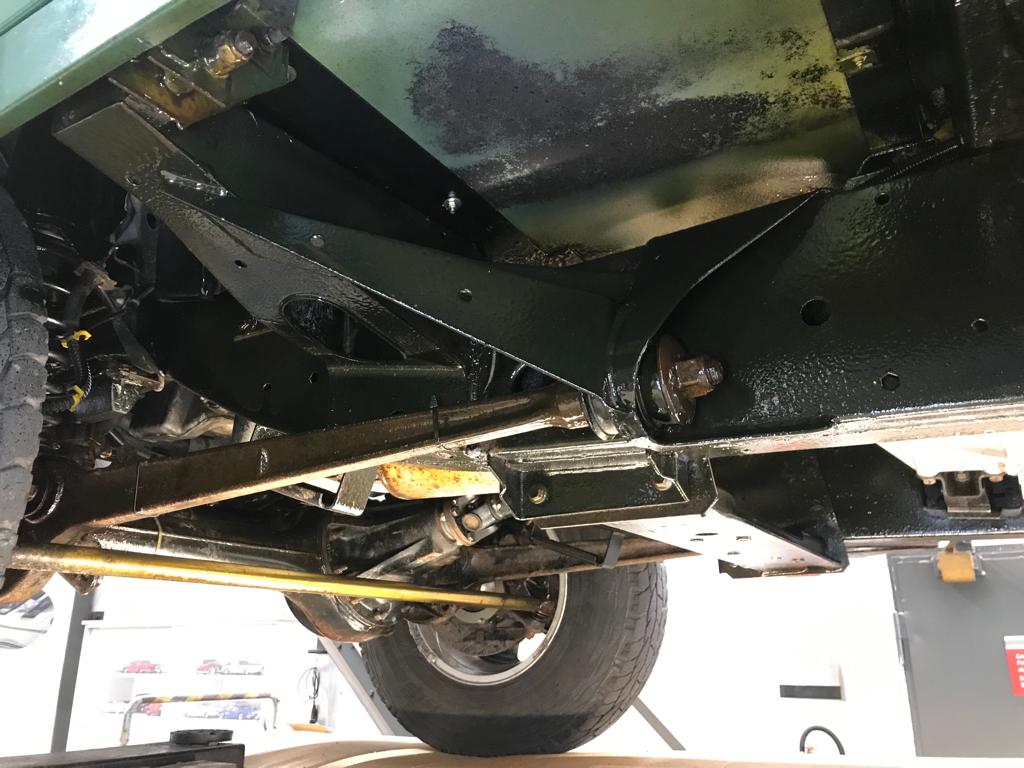
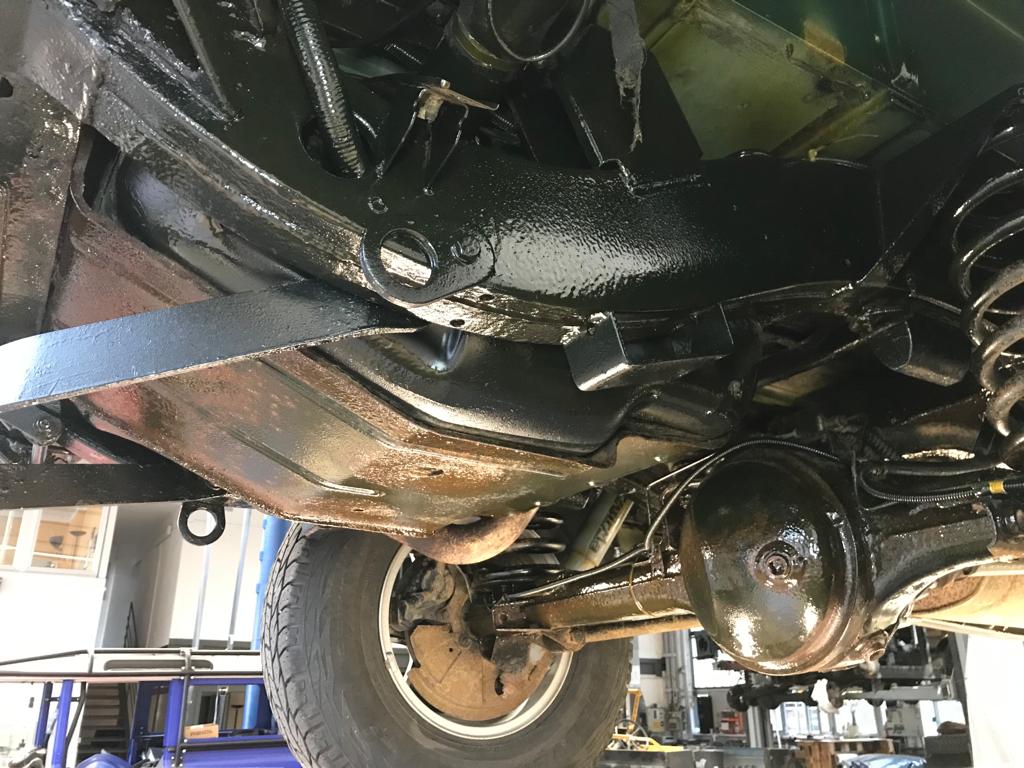
Once you’re under there, take a torch — a good one, not a phone screen — and go methodically from front to back. Look at the chassis rails, the floor panels, the outriggers, the sill areas, the area around the fuel tank, the suspension mounting points, and the sections around the exhaust. What you are looking for: bubbling or flaking underseal, discolouration, pitting in the steel, any areas where metal has become soft or paper-thin, and — in the worst cases — rust-through holes.
Take photos. You’ll be glad to have a record of what you found and where.

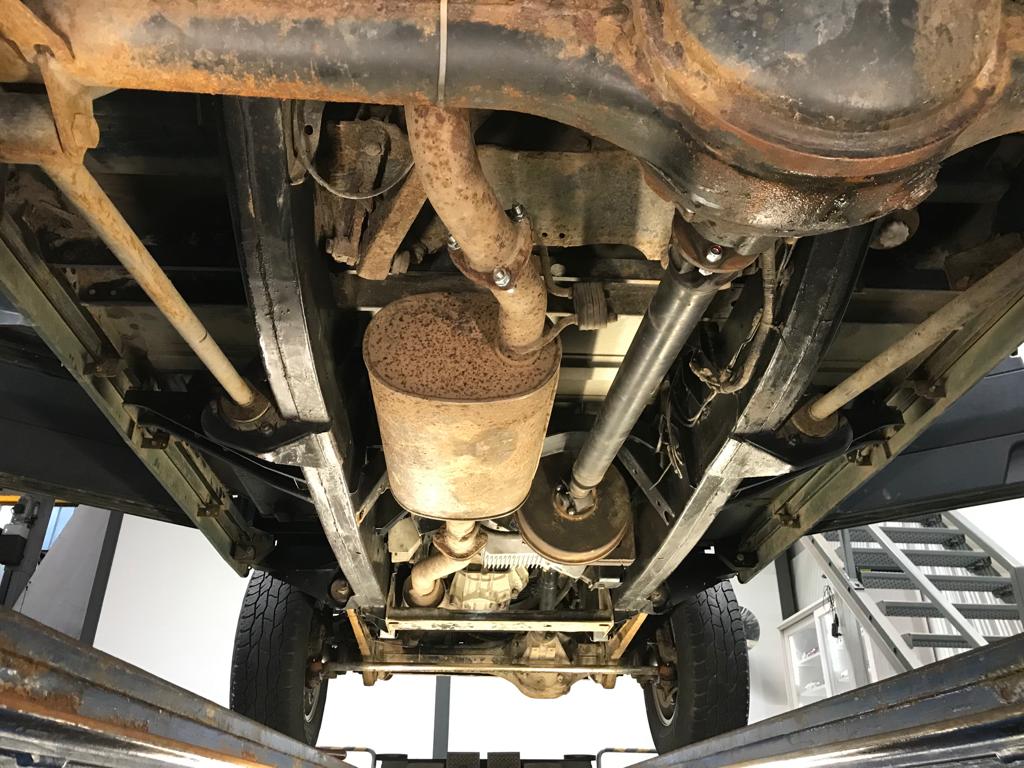
Step 2: Clean Everything Down to Bare Metal
This is the step that takes the longest and gets skipped the most — and it’s the reason why so many underbody protection jobs fail within a few years.
You cannot put any protective coating over contaminated, oily, or actively rusty metal and expect it to bond properly. It will look fine for a while. Then the sealant lifts, moisture gets behind it, and the rust underneath accelerates because it’s now insulated and damp.
Start with a high-pressure washer or, better, a steam cleaner. Remove every piece of mud, every deposit of old sealant that is already flaking or bubbling, every layer of road grime. This alone can take an afternoon on a vehicle that has been working for years. Let it dry completely before moving on — warm days or a heated garage are ideal.
Once the vehicle is dry, go over the whole underbody with wire brushes, an angle grinder with a wire cup attachment, and a stripping disc for any areas with stubborn old coating. The goal is clean, solid metal — or at minimum, a surface where you know exactly what you are looking at.
Step 3: Assess the Damage — Rust, Rot & What to Do About It
Now that the surface is clean, you can see the actual state of the metal. This is where you make the decision about what the job actually involves.
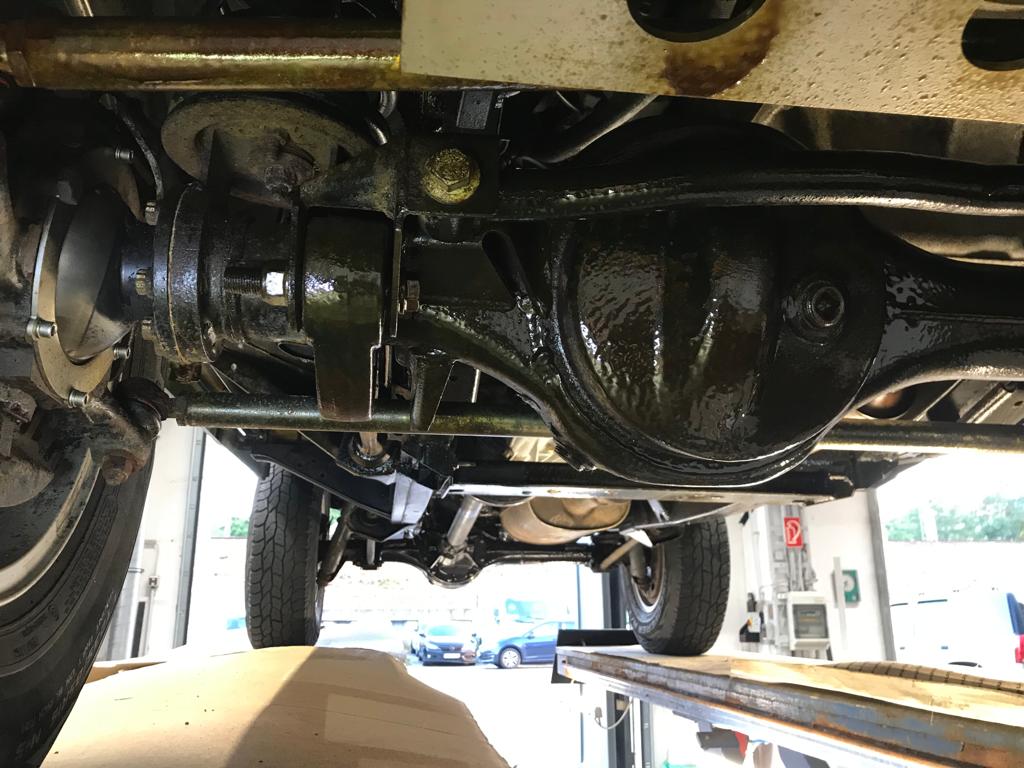
Surface Rust: Treatable
A reddish-brown discolouration across the surface of steel panels, with no pitting or soft spots, is surface rust. It looks alarming but is manageable. Treat it with a phosphoric acid-based rust converter, which reacts chemically with the iron oxide, neutralises it, and converts it into a stable compound that primer can bond to. Apply generously, let it work for the time specified on the product, and allow it to dry fully before priming.
Surface rust treated this way is not a structural concern. It needs to be addressed — but you are not looking at a welding job.
Deep Corrosion or Rust-Through: Cut It Out
Pitting, soft spots, or holes in the steel cannot be treated with a converter or coated over. The only correct answer is to cut back the affected area to solid metal and weld in new steel. This applies to floor panels, chassis sections, and sill areas equally.
If you are not equipped to do this yourself, get a welder involved before you buy a single can of underseal. Coating over structurally compromised metal serves no one — it only delays the inevitable and makes the eventual repair worse.
Step 4: Apply Rust Converter to Any Remaining Surface Rust
Once the major cleaning and any welding work is done, go over the entire underbody one more time with rust converter, focusing on any areas where surface rust remains. Pay particular attention to joints and seams where two pieces of metal meet — these are moisture traps by nature and tend to collect rust even when the surrounding panels are clean.
Follow the product instructions carefully. Most rust converters need to be applied to a damp or slightly rusty surface — not bare shiny steel, but also not to heavily contaminated metal. Let the converter dry to a dark grey or black finish before you move to the priming stage. Rushing this step wastes the product and undermines the layers that follow.
Step 5: Underbody Primer — The Layer That Actually Holds Everything
Primer is not optional. It is the bonding layer between the bare metal and all the protective coatings that follow — and skipping it, or applying sealant directly to bare or converted steel, significantly reduces how long the whole job lasts.
For an older vehicle that has had corrosion issues, zinc phosphate primer is the right choice. It provides active corrosion inhibition rather than just a physical barrier — it bonds to the steel at a chemical level and keeps working even if the top coats are eventually compromised.
Apply it in a thin, even coat across all bare and converted metal areas. Two thin coats are better than one thick one. Allow full drying time between coats and before moving on to the underbody sealant — check the product datasheet for specific times, as these vary with temperature and humidity.
Step 6: Underbody Sealant & Stone Chip Protection
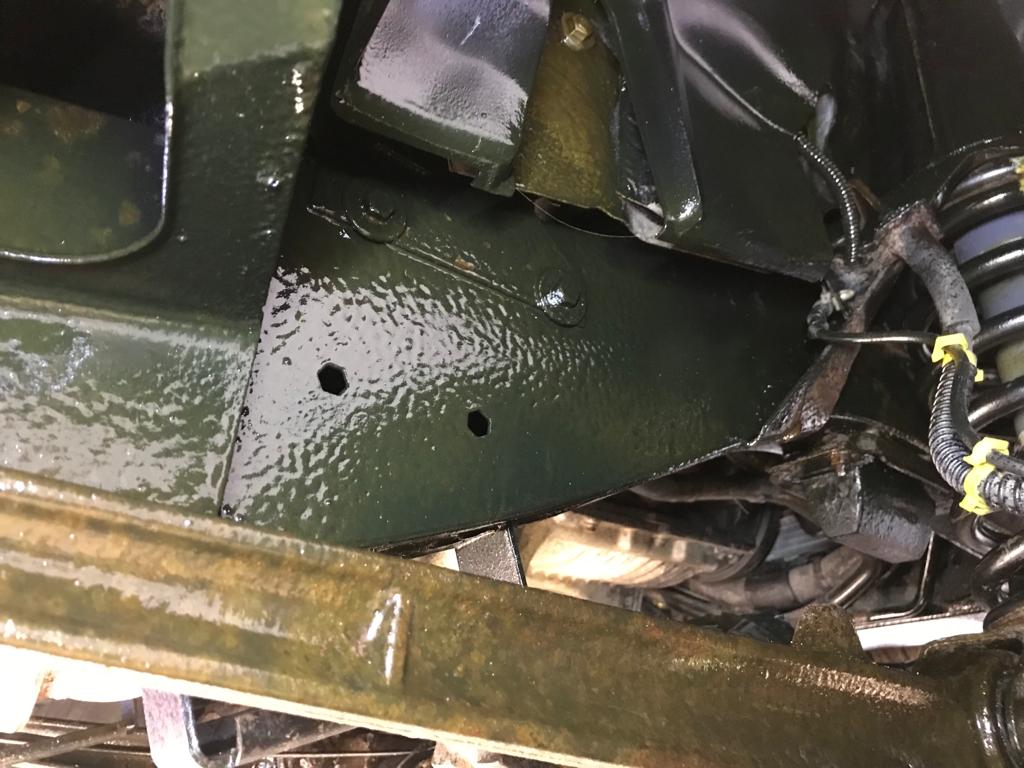
This is the layer most people think of when they talk about underbody protection — the heavy, rubberised coating that deadens stone impacts, seals the surface against water ingress, and gives the underbody that clean, dark, protected appearance.
Brush-on underseal is more work but gives better control and a thicker build-up on areas that need it most. Aerosol or spray products are faster and better suited to flatter surfaces. For a whole-vehicle application, a combination of both often makes sense — spray for large flat panels, brush for corners, edges, seams, and the areas around chassis rails where you want maximum coverage.
Apply the sealant in the sequence specified on the product — most require the primer to be fully cured first. Work methodically from one end of the vehicle to the other, and make sure to cover the full width of the floor, the inner and outer faces of the chassis rails, the sill areas, and the wheel arch liners.
Let it cure fully before putting the vehicle back on the ground.
Step 7: Cavity Wax — The Step Most People Skip
Cavity wax is the final step — and in many ways, the most important one that most DIY underbody jobs leave out entirely.
Chassis rails, sills, A-pillars, B-pillars, door seams — these are all hollow sections that trap moisture from the inside. The outside can be perfectly sealed, but if water is sitting inside a chassis rail with no protection, it will corrode from the inside out. You will never see it until the metal fails.
Cavity wax is injected into these sections through access holes using a long application lance and an aerosol can. It’s a thin, wax-based fluid that flows into every corner, displaces any remaining moisture, and cures to a flexible, self-healing barrier that moves with the chassis rather than cracking when the vehicle flexes off-road.
Drill access holes where necessary — in most vehicles, factory drain plugs or existing holes can be used for several sections. Inject generously, rotate the lance as you work, and seal the access points afterwards. It takes time. It’s not glamorous. But five years from now, when someone else’s older vehicle is quietly corroding from within, you will be glad you did it.
How Long Does It Last? And When to Redo It
A properly done underbody protection job on an older vehicle — full clean, converter, primer, sealant, cavity wax — should give you five to ten years of solid protection under normal conditions. For a vehicle that sees regular off-road use, deep wading, or winter driving with road salt, a visual check every two years and a touch-up where needed is sensible practice.
What to look for when you check: bubbling or lifting sealant (moisture underneath), discolouration through the coating (rust is moving again), cracking at joints or seams (the sealant has gone brittle). Any of these is a sign to clean back the affected area and redo that section before the underlying metal is involved.
Cavity wax can be topped up every three to five years as a precaution, regardless of visible condition — it costs little and the access is already there from the first application.
Final Thoughts: Do It Once, Do It Right
There is a version of this job that takes a Saturday afternoon — a quick wire brush, a can of spray-on underseal, and the comfortable feeling that you’ve done something. That version wears off, lifts, and fails in ways you won’t notice until a lot later.
And then there is the version described here. It takes longer. It requires proper materials, patience, and occasionally a trip to a welder. But it’s the version that actually works — that keeps the steel sound for the years of use and the kilometres of dirt track that follow.
Old vehicles earn their scars. But structural rust is not a scar — it’s a slow failure, and one that is entirely preventable when you deal with it properly, once, from the ground up.
The underbody is where the adventure actually happens. Treat it accordingly.