Gluing a Headliner in the Defender: Getting Automotive Felt Cleanly onto Armaflex
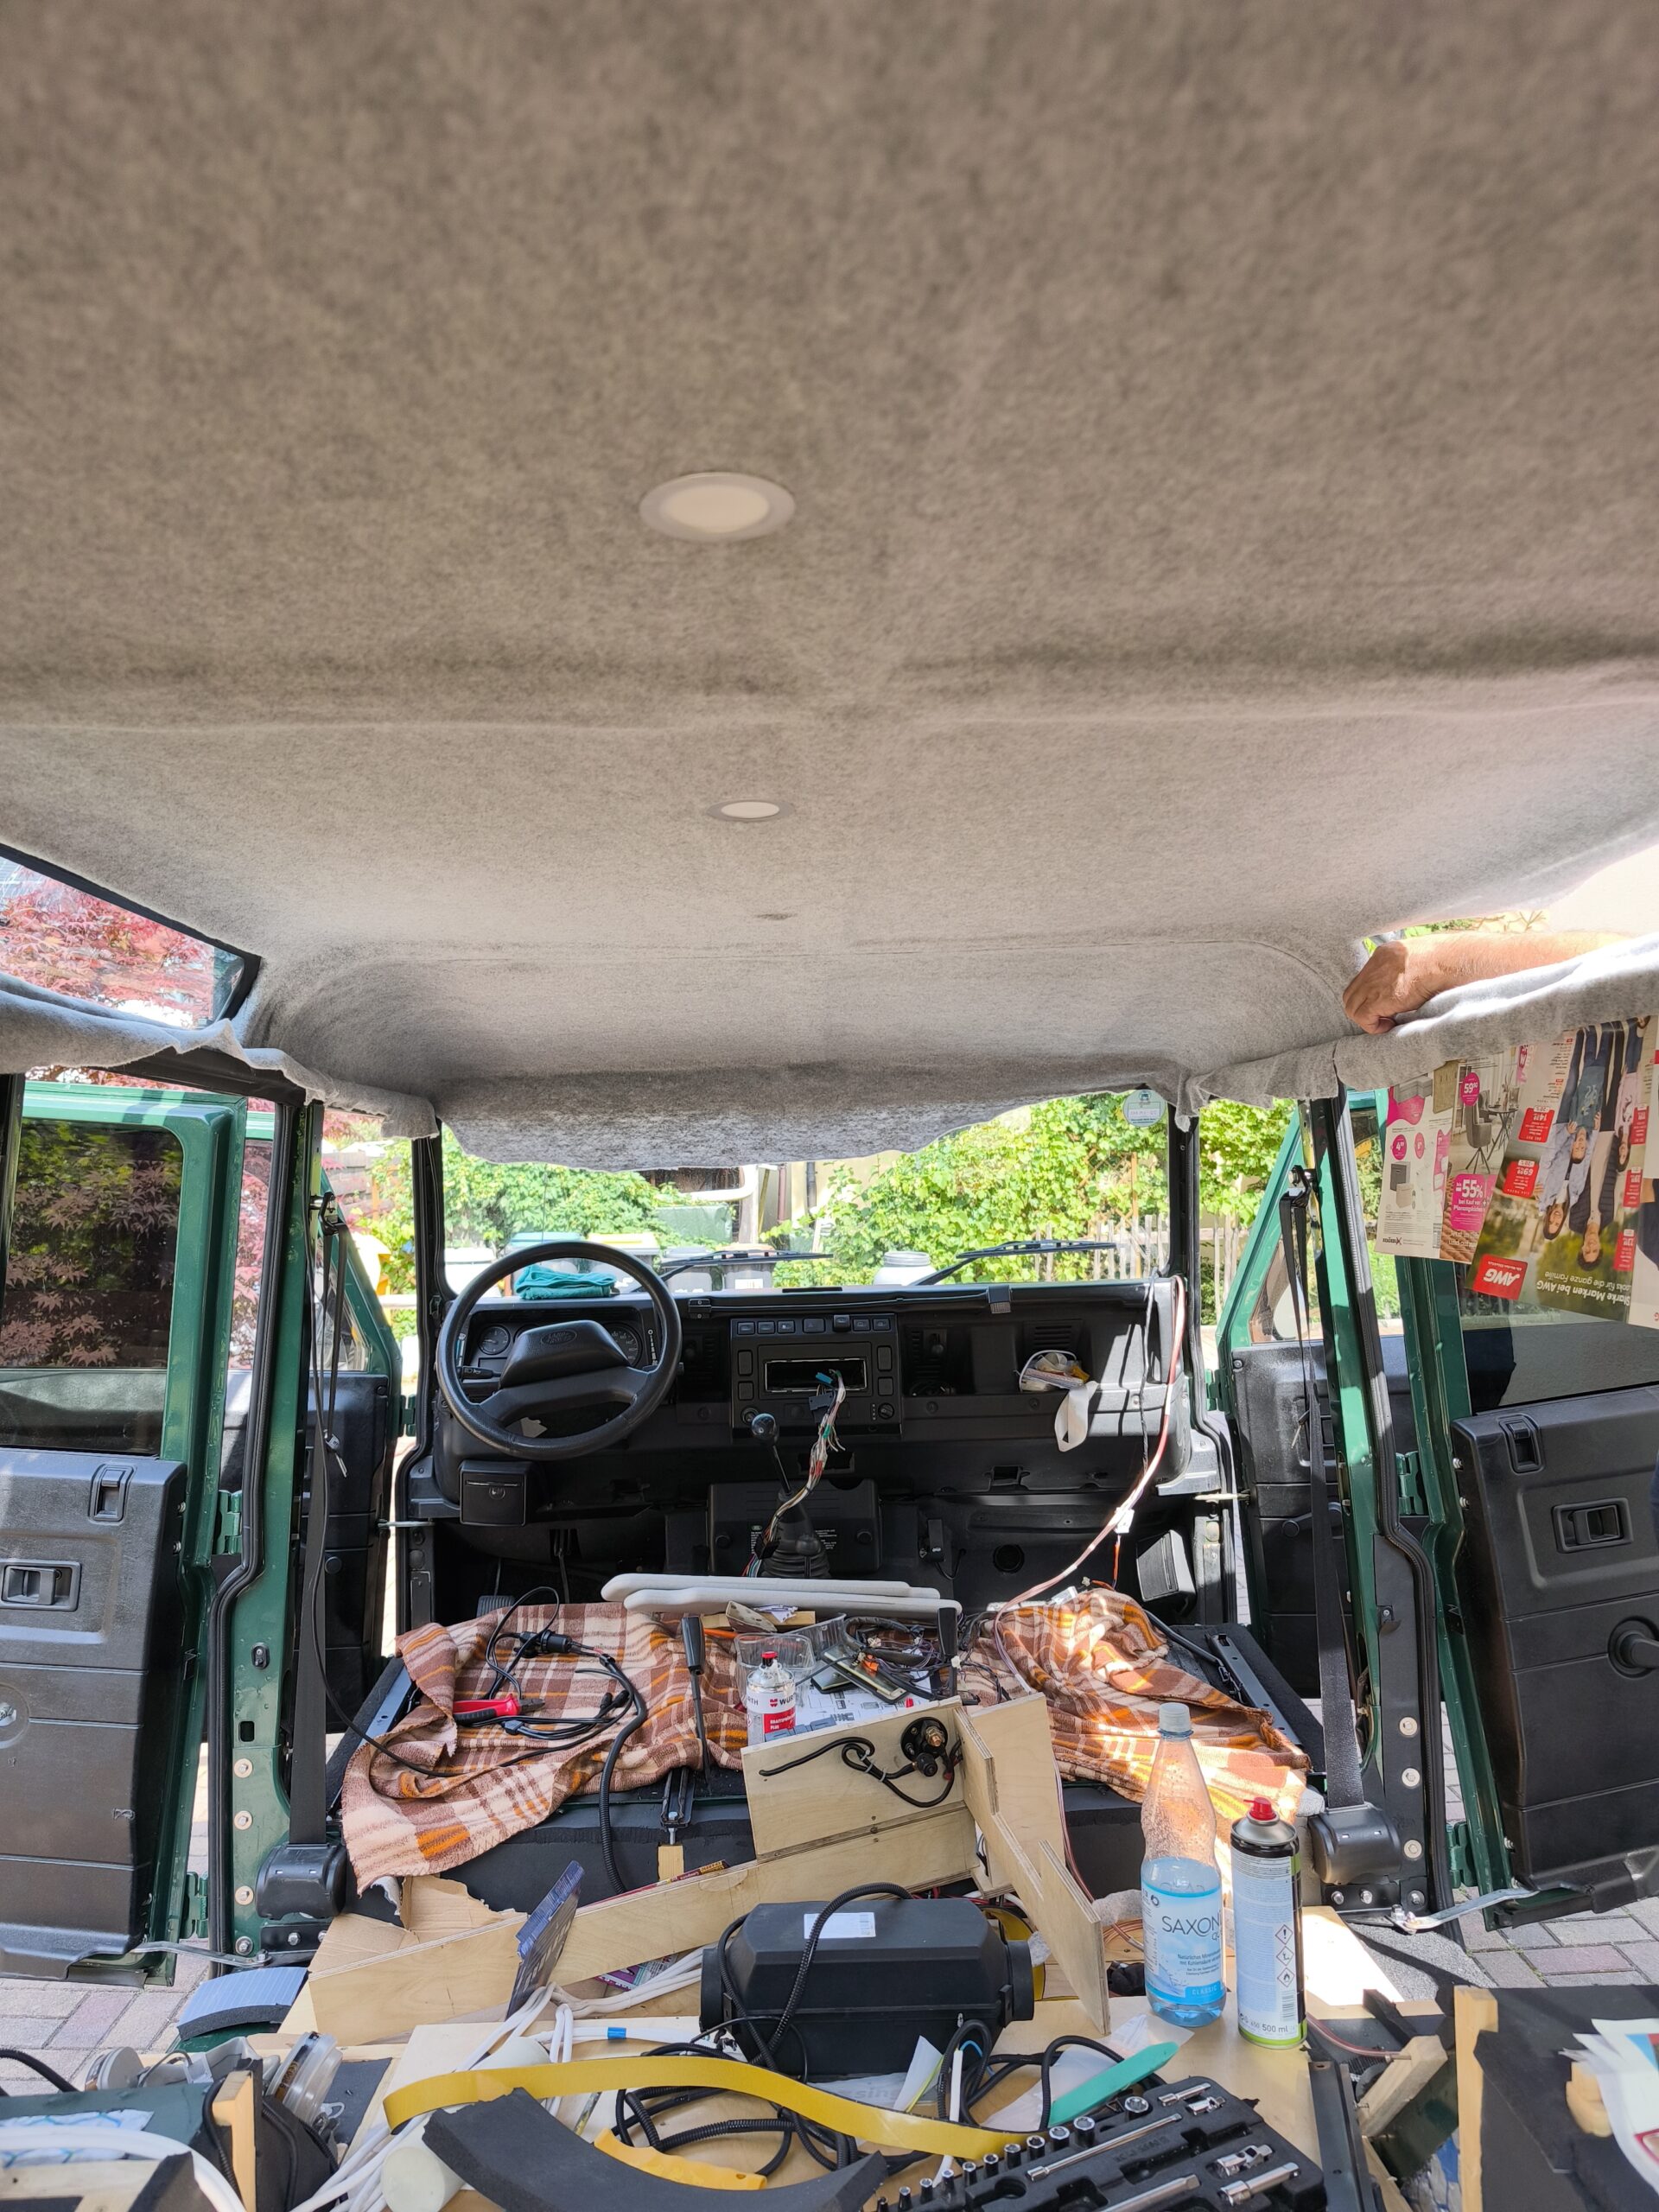
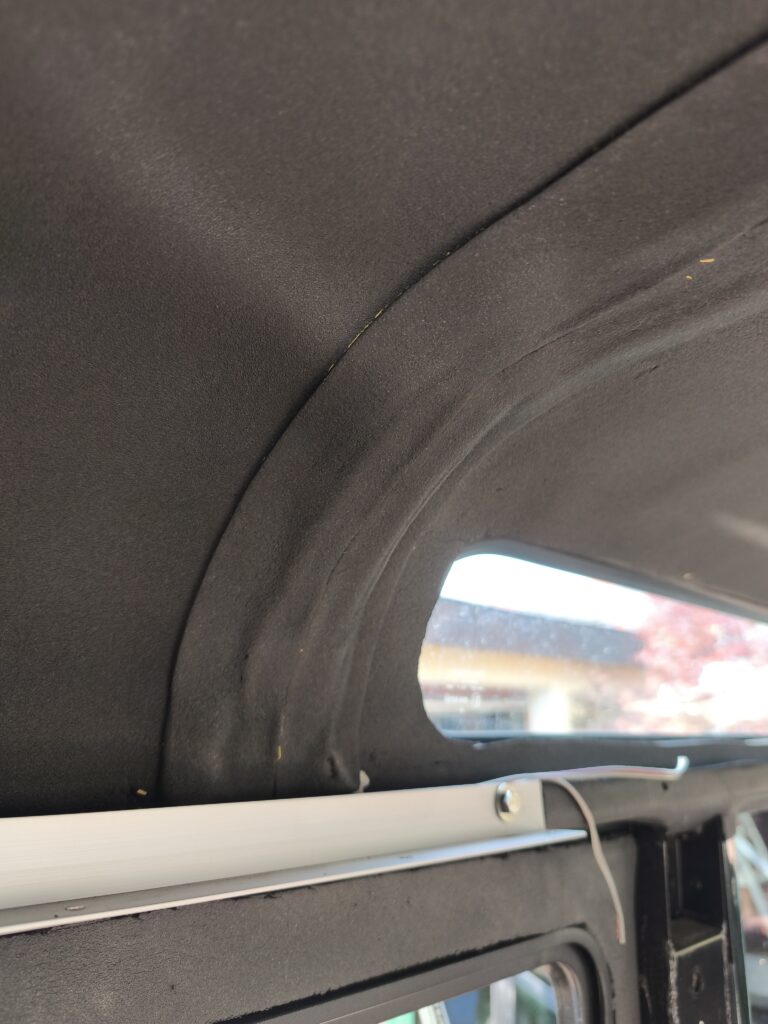
The headliner is the first thing your eyes land on when you wake up in the car in the morning — and at the same time one of the most thankless gluing jobs in the entire build. After insulation, a ceiling covered in black Armaflex looks functional, but unmistakably like a construction site. A piece of automotive felt over the top transforms the insulation into a living surface. Sounds simple. On the flat sections it is — and on the edges and in the corners it becomes a test of patience.
The Layer Stack
In our build, the felt sits directly on the insulation: we glued automotive felt onto 19 mm Armaflex, using a 3 mm stretch fabric. The stretch matters more than you’d think — more on that in a moment. We used Würth spray adhesive, which we’ve had good results with. You really do see every unwanted bump far more clearly than you’d expect at the start. Make sure your substrate is already as perfectly flat as you want the finished result to look — in our case, that honestly wasn’t true everywhere.
Work in Pairs — Seriously
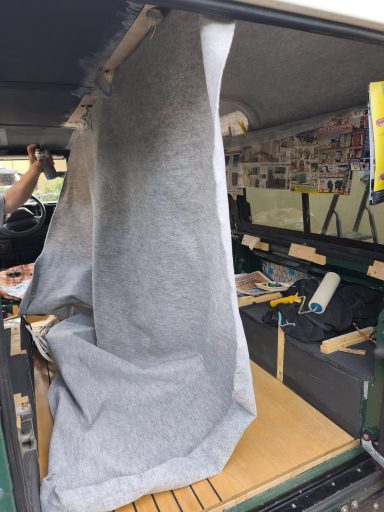
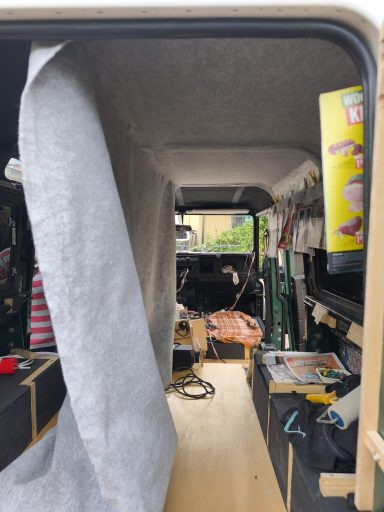
First and best tip: do this with two people. One sprays and guides the length of felt, the other presses it down. You simply can’t get a length of fabric onto a curved ceiling without creases while the contact adhesive is already grabbing — not on your own. Before the first spray goes down, mask off everything that shouldn’t get any adhesive on it — and in doubt, that’s more than you think. Spray adhesive travels as a fine mist and settles everywhere. In the small, enclosed space of the Defender especially, wear a mask. You don’t want that stuff in your lungs.
Step by Step
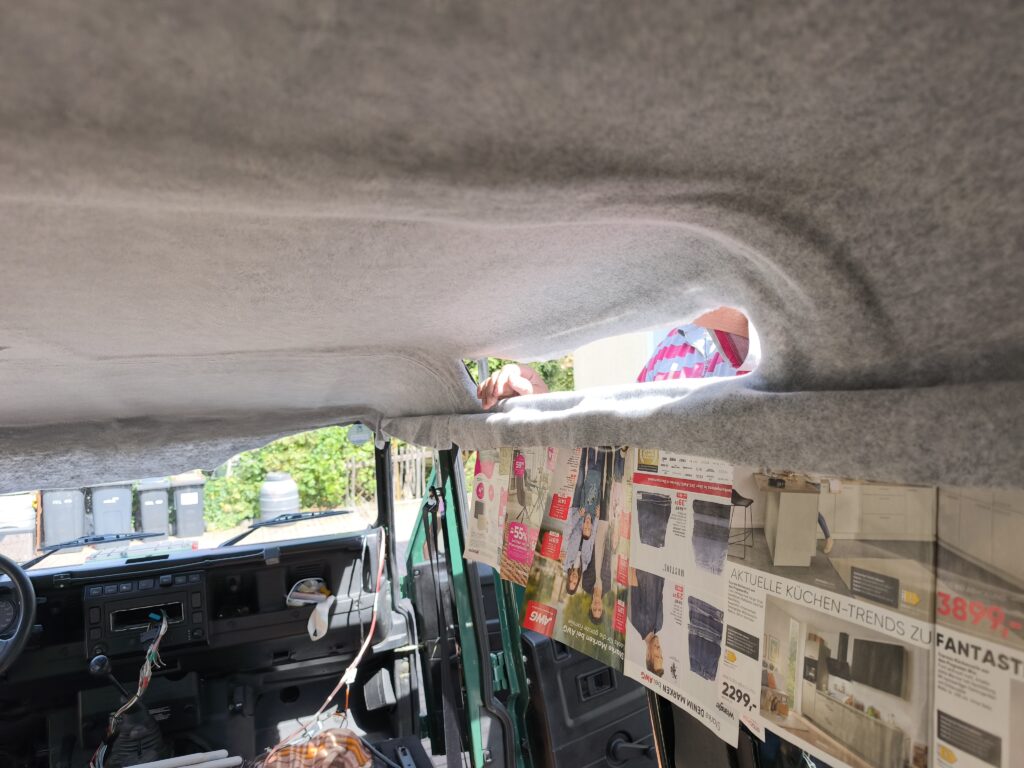
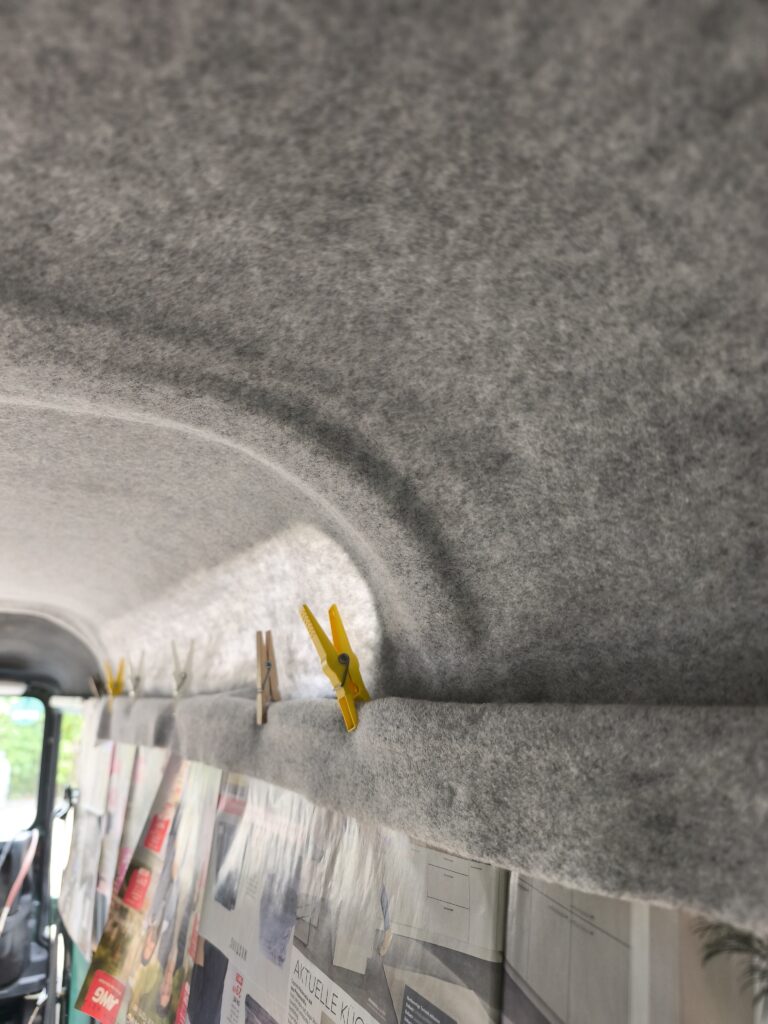
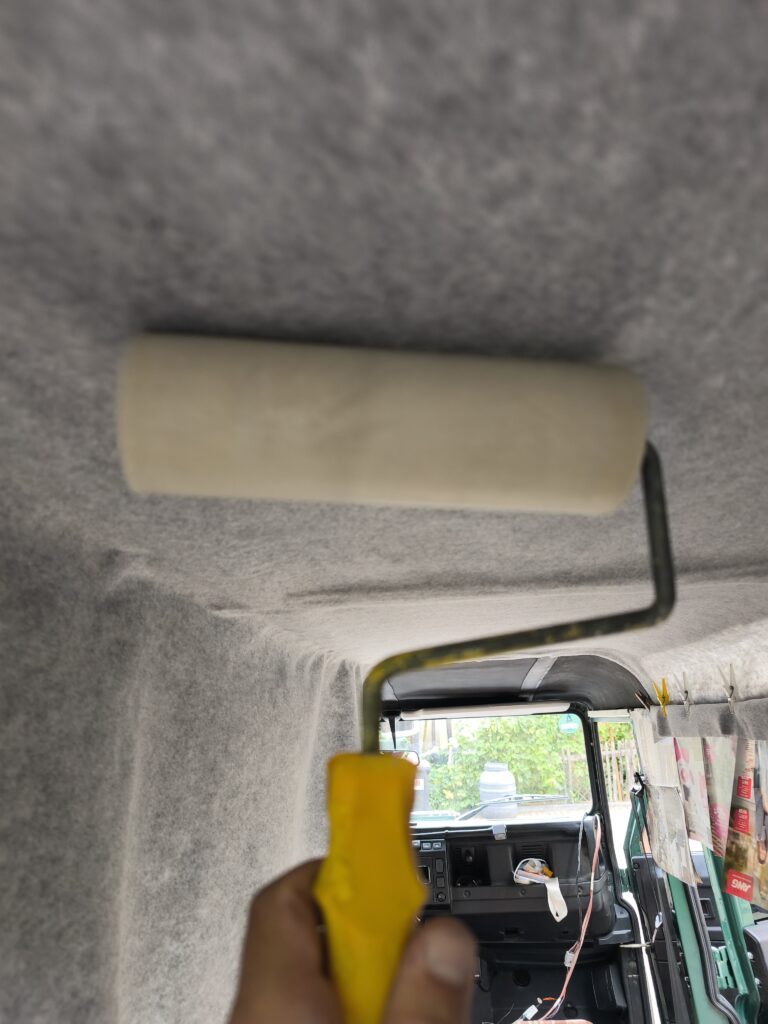
Start at one end and work forward section by section: spray a stretch, lay the felt, press it down immediately, then move to the next section. Don’t spray the whole ceiling at once — the adhesive starts to tack before you can keep up. The more stretch the material has, the better it conforms to the curves and contours of the Defender’s roof without producing creases. We clipped the felt at one edge with clamps to make getting started easier. The gluing and pressing down then goes very well with a soft paint roller.
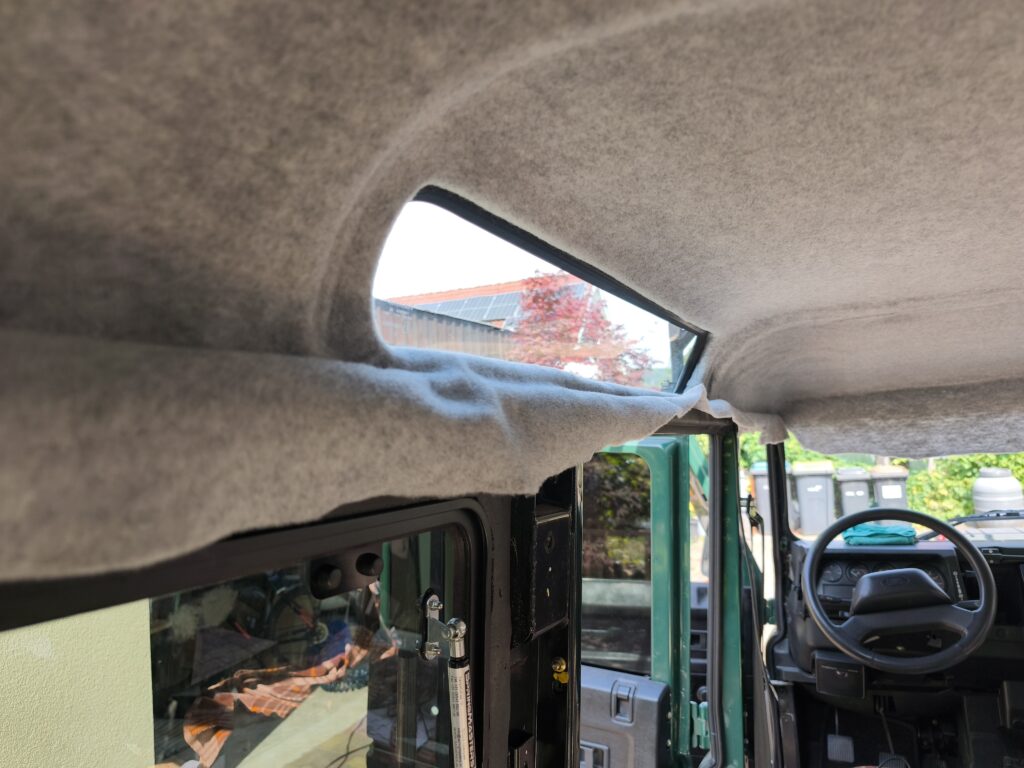
Leave the edges and corners until last: trim the overhanging felt cleanly with a box cutter. And here’s the point I can’t stress enough — the blade has to be genuinely sharp. A dull blade drags at the felt, frays the edge, and pulls the freshly bonded length back off the ceiling. Sharp blade, steady hand, one clean cut. You’ll also need to swap blades more often than you’d expect across a full surface.
The Defender’s roof lights are not quite as straightforward. The frame section at the bottom is quite narrow. With the Armaflex in place, you really want to tuck the felt slightly under the insulation at the edges so it looks halfway decent. We removed the windows to be able to reach the edges properly from the outside as well.
Our Mistakes — So You Don’t Make Them
Being honest here, because these are exactly the details that decide the result:
Don’t skimp on adhesive. We went light in one or two spots, and those are exactly the places that are now starting to peel away. Better to spray generously once than to redo it twice.
Heat is the enemy. During the heatwaves this summer, a few spots under the ceiling came loose again. That’s partly down to the adhesive, partly down to the heat that builds up under a roof — another reason not to go light on the glue.
One piece if at all possible. The join between two lengths of felt is almost impossible to make invisible. I’d unfortunately bought too little material and had to split the headliner into two pieces — and you can see the seam if you know where to look. Buy one length too many and do the whole ceiling in one piece. We covered the join with a nice colourful strip of tape, which also breaks up the monotony of a single-colour ceiling.
Headliner first, then the dirty work. If the rest of the build isn’t finished yet, the light-coloured felt is an open invitation for stains. I managed to get oil spots on it from later work — and they’re staying there. If possible, do the headliner late in the build process — or cover it well.
Ceiling Spotlights
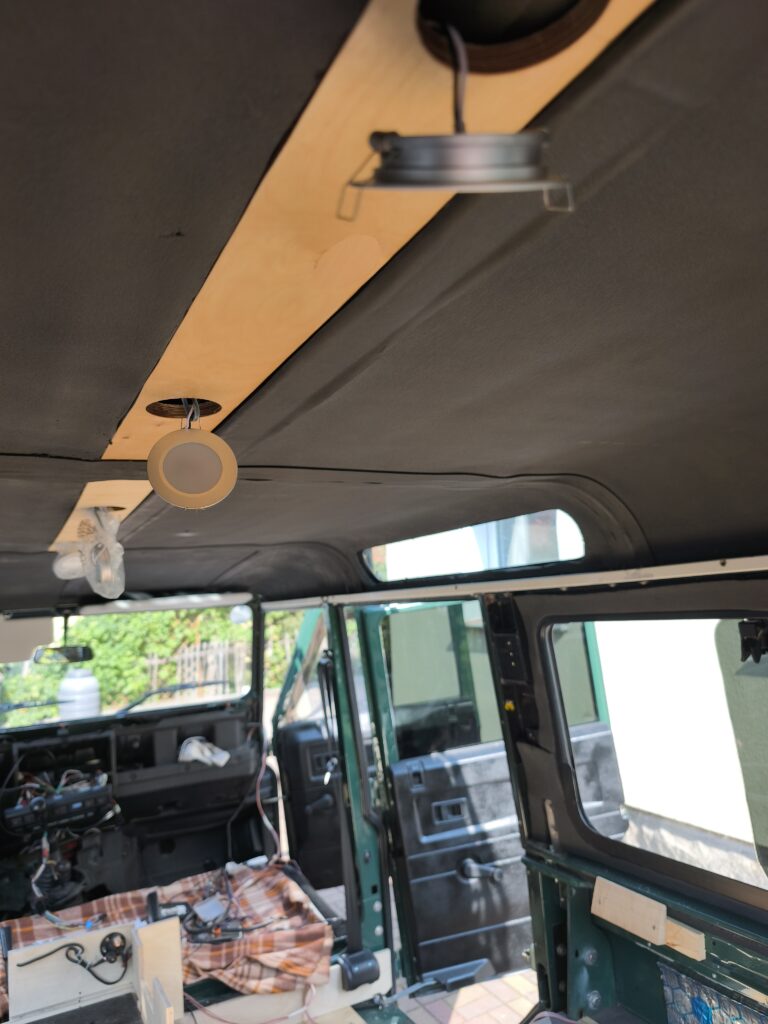
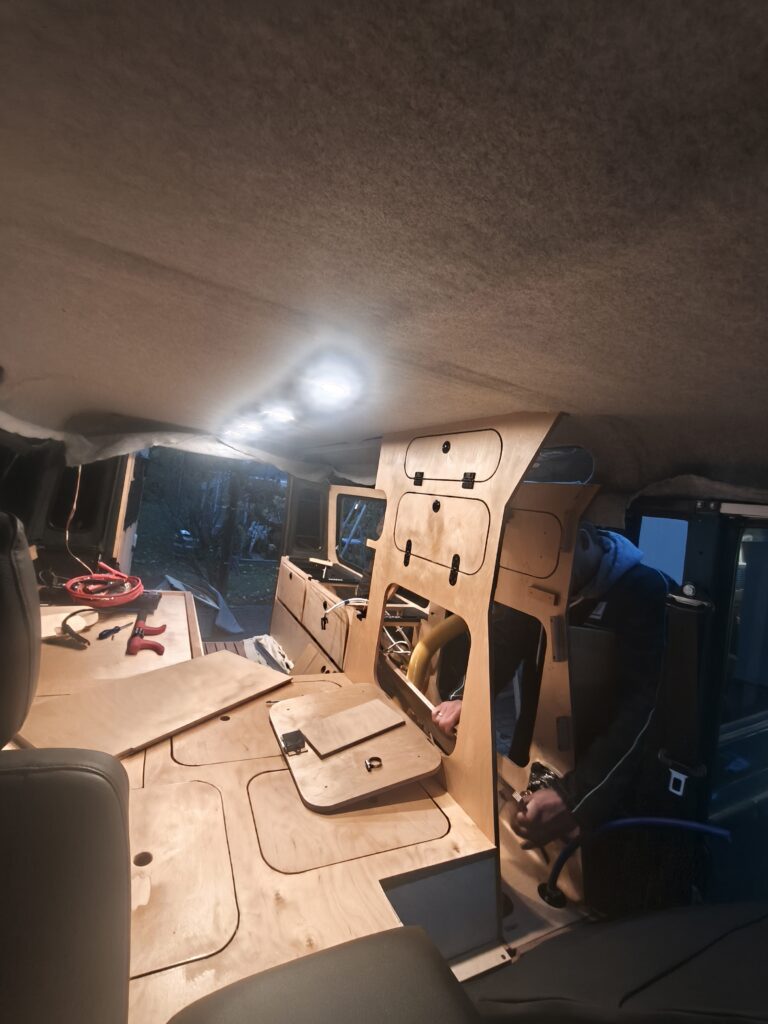
We fitted four lights into the headliner in total. To do this, a board was recessed between two roof cross-members into the Armaflex (the insulation is slightly thinner there). We were then able to mount the ceiling lights into the board. Again, a sharp blade is recommended for cutting the holes in the felt for the lights. We went with four lights because when two people are in that tight space, one of you can easily end up blocking a light source — with four spots, there’s still enough light from the others.
Conclusion
On the flat sections, the headliner goes up quickly and transforms the interior enormously. The tricky parts are the edges and getting the adhesive quantity right. Two people, a sharp knife, enough glue, one piece of material — and above your bed there’s no longer construction-site black, but a proper ceiling. Preparation is everything here: every small bump under the felt will be visible once it’s up.