Homemade storage table for the Airliner rail – lightweight, compact, functional
Sometimes the best accessories don’t start with a click on ‘Add to basket’, but with a sheet of paper, a pencil and the thought: I can build this myself. That’s exactly how it was with this project. What began as a simple idea for greater comfort on outdoor trips has since become one of my favourite DIY projects – practical, lightweight and now an indispensable part of everyday life.
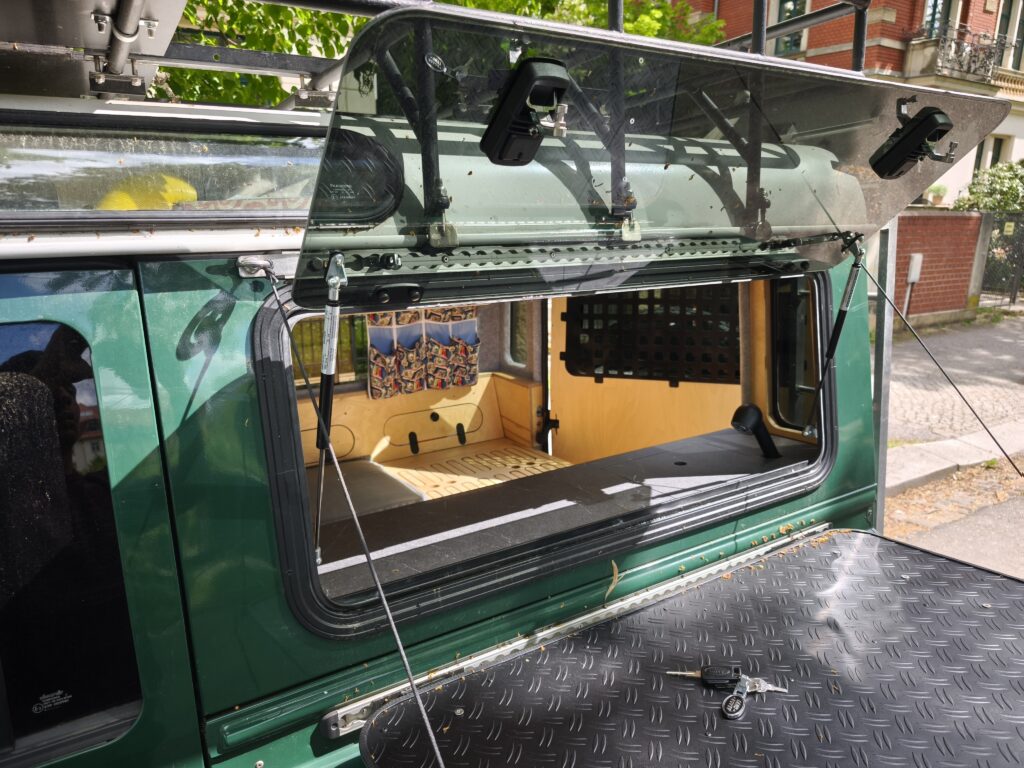
The idea: cooking at the hinged window, eating outside
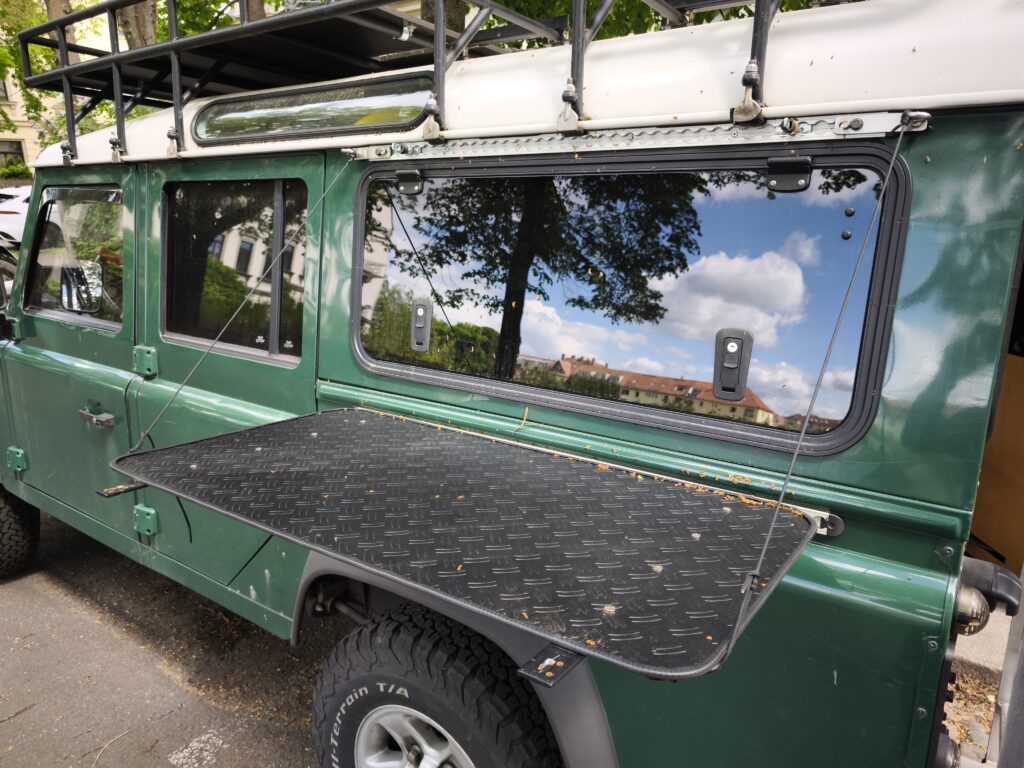
The concept sounds simple, and it is: a folding side window opens the interior to the outside – and that’s exactly where a sturdy side table docks. You sit inside, the stove sits outside on the table in front of the open window. No juggling hot water on the tailgate, no crawling round to the back. Making morning coffee whilst sitting safely inside the vehicle – or having breakfast outside in the sun and making tea on the table next to you. That is exactly what this table is designed to do.
The inspiration came from professional overlanding tables that attach to airliner rails – those sturdy aluminium rails found on vans and expedition vehicles. The principle is brilliant: one click, and the table is in place. Another click, and it’s gone again. But anyone who’s seen the commercial prices knows: you can make one yourself.
Materials & Tools
Here’s everything I used to build it. The list sounds longer than it is – if you’ve got a well-stocked DIY store nearby, you can find everything in an afternoon:
| Material | Quantity | Note |
| Aluminium sheet | 1 piece | 1.5 mm thick, 100 × 60 cm – base plate of the table |
| Aluminium T-profile | 3 pieces | Stiffening profiles (mounted on the underside) |
| Blind rivets (aluminium) | ~30 | For attaching the T-profiles to the panel |
| Brackets for airliner rails | 2 pieces | Connection to the loading rail in the vehicle |
| Loading straps (stainless steel) | 2 pieces | Hinged joints – bolted to the aluminium plate |
| M5 bolts & nuts | 1 set | For securing the drawer runners |
| Sandpaper / deburring knife | — | For clean edges after cutting |
| Optional edge protection (rubber) | 1 roll | Protects the edges and prevents scratches |
The tools I used were a drill with a suitable bit for the rivets, a rivet setter, a metal saw or angle grinder for cutting, as well as sandpaper and a calliper. Everything you’d expect to find in an average DIY workshop.
The build – step by step
Step 1: Cut and prepare the aluminium sheet
The base of the table is a 1.5 mm thick aluminium sheet measuring 100 × 60 cm. Why 1.5 mm? Because that’s the ideal balance between stability and weight. Any thinner and the sheet would bend too much under load; any thicker and it would become unnecessarily heavy.
After cutting the sheet – either at the DIY store or myself using an angle grinder – I carefully deburred all the edges. If you’re careless here, you’ll end up with unsightly (and sharp) edges later on. I also recommend rounding off the corners slightly – not only does this look better, but it also protects your luggage and hands.

Step 2: T-profiles for reinforcement
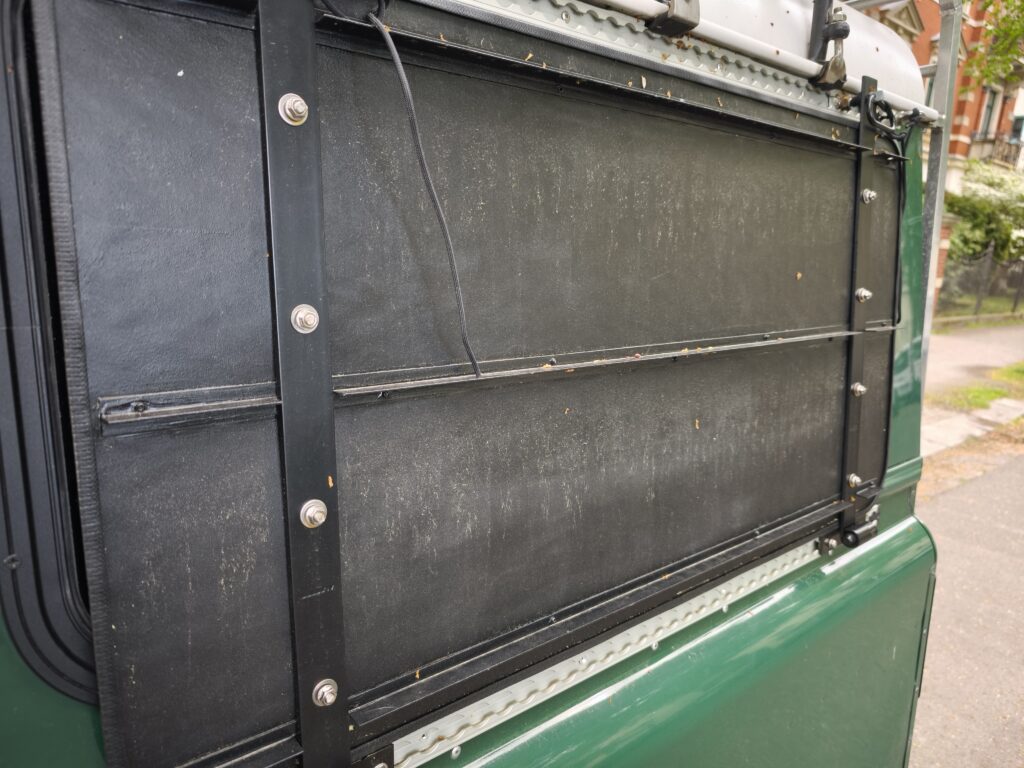
A freestanding aluminium sheet of this size does not have sufficient inherent rigidity in the long run – it would bend under load. That’s why I mounted three aluminium T-profiles on the underside of the sheet.
I used blind rivets for the fastening. First, mark out the position of the profiles, then drill the holes in the panel and profile at equal intervals. Important: always work from the inside out to prevent the profiles from warping. This is quick with a rivet setter – and the result is a surprisingly rigid, lightweight construction.
After riveting, I laid the panel flat on the floor and applied light pressure to check if it still deformed. Nothing. Perfect.
Step 3: Fit the brackets for the airline rails
This is the crucial step that makes the table truly functional: two brackets that snap directly into the vehicle’s airline rails. The airline rail is a standardised system – the matching brackets are available from specialist retailers in various designs.
I attached the brackets to the underside of the aluminium panel, exactly at the spacing of my vehicle’s rails. Precision is key here: the spacing must be correct, otherwise the table won’t clip into place properly. A quick measurement of the rail spacing in the vehicle beforehand saves a lot of frustration.
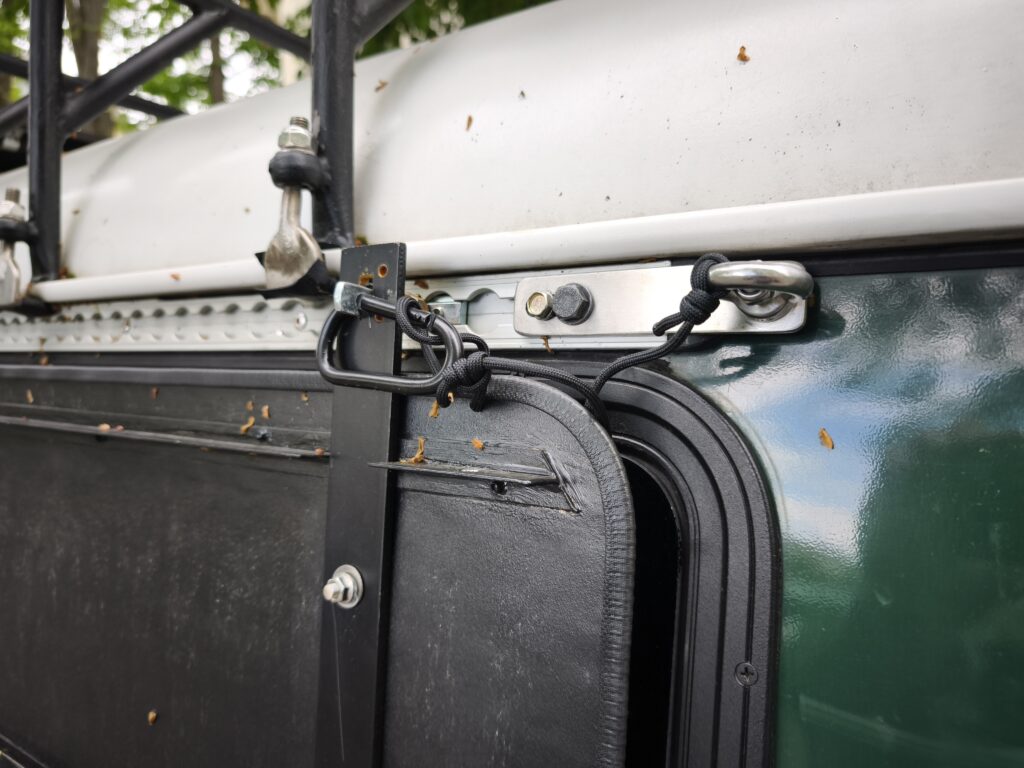
Step 4: Screw on drawer runners as a folding hinge
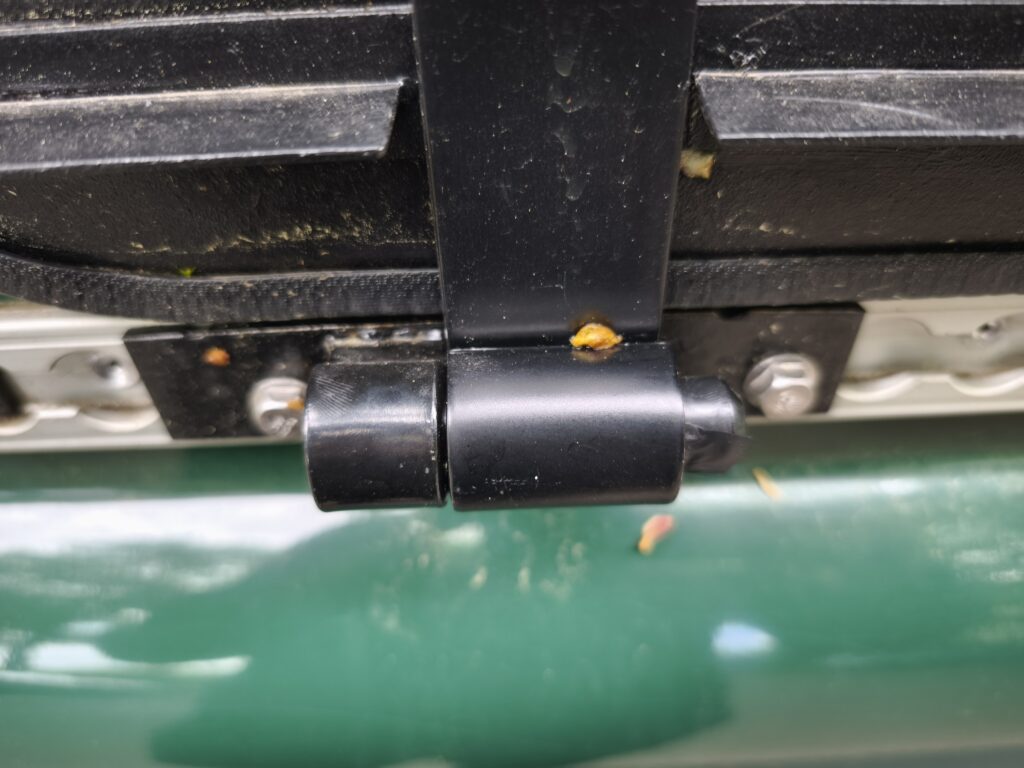
To ensure the table can not only be securely mounted but also folded up – for example, to store it space-savingly or use it as an angled shelf – I screwed two stainless steel drawer hinges onto the rear edge of the plate.
Drawer hinges are robust, inexpensive and available at any DIY store. They were screwed directly onto the aluminium top using M5 bolts and nuts. Thanks to the rivets on the T-profiles, I was able to take the load paths into account and position the hinges where the top is particularly rigid.
Important during installation: align the hinges so that the table can be fixed both horizontally and at a practical angle. In my case, the table can be folded out completely flat and also stood upright – both have proved practical in everyday use.
The result – and what I would do differently next time
The finished table weighs barely more than two kilograms, sits rock-solid in the airliner rails and can be fitted and removed in seconds. On long journeys, it has proved surprisingly versatile: as a storage surface for small items, as an improvised breakfast table by the tailgate, or as a surface for maps and notebooks.
What would I improve next time? I’d plan for a rubber edge guard all the way round from the start – not just to protect against scratches, but so things don’t slide off the table surface so easily. And perhaps mill a small recess for drinks bottles. But that’s optional, not essential.
Conclusion: It’s worth building it yourself
In the end, this table cost me under 70 euros – and a relaxing afternoon in the workshop. Comparable ready-made solutions from specialist retailers cost many times that amount. If you’re reasonably handy and enjoy tinkering, I can highly recommend this project.
The beauty of building it yourself isn’t just the savings – it’s the understanding. Afterwards, you know exactly why something is built the way it is. And if something breaks along the way, you also know how to fix it. That’s priceless on an expedition.
If you have similar projects or any questions about the build, feel free to drop me a line in the comments. I always enjoy chatting with others who prefer to customise their vehicle to their own specifications rather than buying ready-made solutions.
Good luck with your build – and safe travels!